
In this guide
- The Quick Answer
- Free Online Background Removers
- How to Remove Backgrounds in Canva
- How to Remove Backgrounds in Photoshop
- How to Remove Backgrounds on iPhone and Android
- How to Remove White Backgrounds Specifically
- What to Do After Removing the Background
- Tips for Getting Clean Background Removals
- Which Method Should You Actually Use?
The Quick Answer
If you just need a background removed right now, go to remove.bg, upload your photo, and download the result. It's free for standard resolution, takes about five seconds, and handles most photos surprisingly well. Done.
But if you need higher quality, more control, or you're removing backgrounds regularly for client work, keep reading. There are better options depending on your situation, and the differences between them actually matter.
Three main approaches exist for removing backgrounds from images: free online background removers (fast, good enough for social media), Canva (great middle ground for non-designers), and Photoshop (maximum control for professional work). Each has real tradeoffs worth understanding.

Free Online Background Removers
These tools run entirely in your browser. No software to install, no account required for most of them. You upload a photo, AI does the work, you download the result. For quick jobs, they're genuinely excellent.
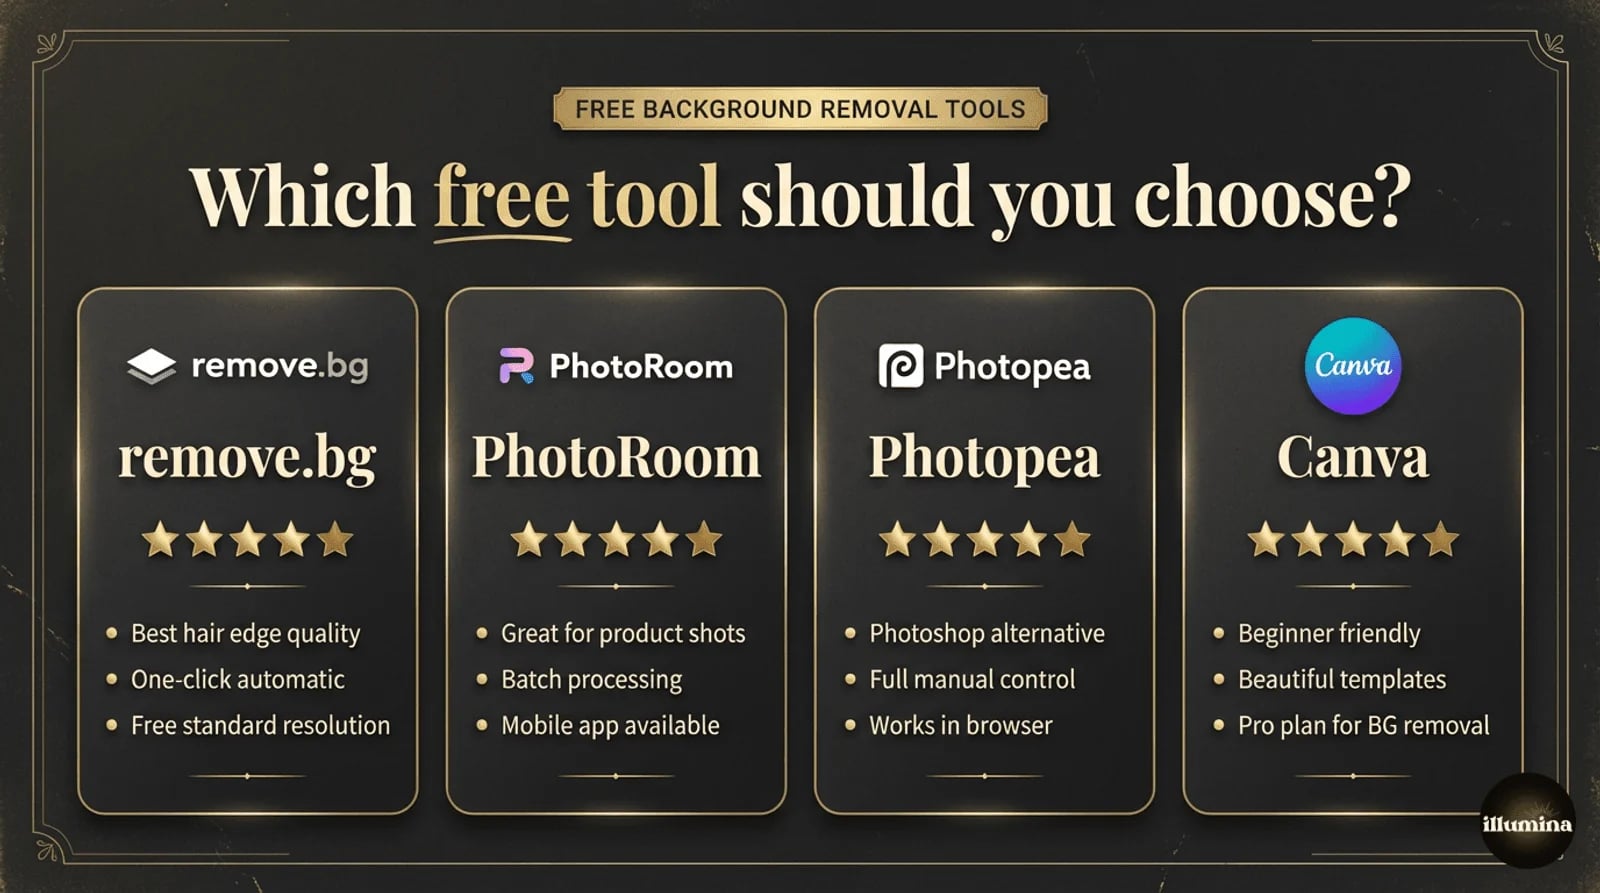
remove.bg
The most popular free background remover, and for good reason. It handles hair edges better than most competitors and works with portraits, products, animals, and cars. The free version gives you a preview-quality download (up to 0.25 megapixels). Full resolution requires credits, which cost roughly $0.20-0.90 per image depending on your plan.
Where it falls short: complex scenes with multiple subjects, transparent or semi-transparent objects (like glass), and photos where the subject and background are similar colors. Also, that free resolution cap is a real limitation if you need print-quality output.
PhotoRoom
A strong alternative that includes basic editing after removal. PhotoRoom lets you swap in new backgrounds, add shadows, and resize for different platforms, all in the browser. The free tier adds a small watermark to downloads. The AI quality is comparable to remove.bg for most photos, though it occasionally struggles more with fine hair detail.
PhotoRoom really shines for product photography. If you're shooting items for an online store and need clean white backgrounds, it's arguably better than remove.bg for that specific use case.
Photopea
A full Photoshop clone that runs in your browser. Completely free. Photopea isn't a one-click tool. It's an actual image editor with layers, masks, selection tools, and basically every feature Photoshop has. The learning curve is steeper, but you get professional-level control without paying anything.
If you know Photoshop but don't have a subscription, Photopea is the answer. The Select Subject tool works similarly (though slightly less accurately), and you have access to the same manual refinement tools. It even opens PSD files.
Canva's Free Background Remover
Canva offers background removal in its free plan now, though with limitations. The quality is decent for social media use. For the full-featured version with manual erase and restore brushes, you'll need Canva Pro. More on Canva's workflow in the next section.
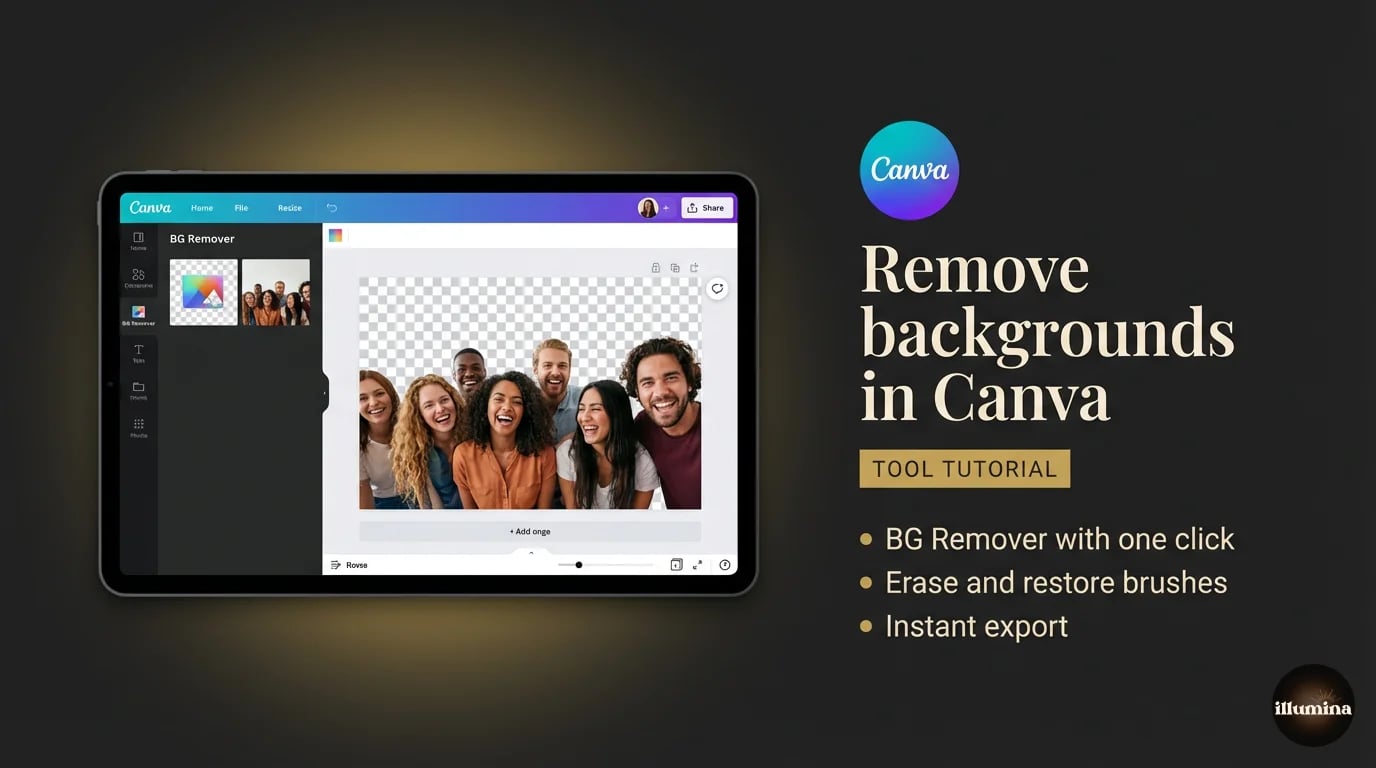
How to Remove Backgrounds in Canva
Canva sits in a sweet spot between the one-click online tools and full editing software. You get more control than remove.bg without the complexity of Photoshop. And since so many people already use Canva for design work, adding background removal to your existing workflow is seamless.
Step-by-step walkthrough
Open Canva and start a new design (any size works, though matching your intended output dimensions saves hassle later). Upload your photo by clicking "Uploads" in the left panel, then drag it onto your canvas.
Click on the image, then hit "Edit Image" in the top toolbar. Scroll to or search for "BG Remover" and click it. Canva's AI processes the image in about five to ten seconds. For most well-lit photos against reasonably clean backgrounds, the auto-removal is very good.
Refining the edges
This is where Canva Pro earns its keep. After the initial removal, you'll see "Erase" and "Restore" brush options. Zoom in to at least 200% and work around problem areas, typically hair, wispy fabrics, and anywhere the subject color is close to the background color.
The brush size slider matters more than you'd think. Go small (around 5-10) for detail work along hair and edges. Go large (30+) for cleaning up obvious missed chunks. And work slowly. Rushing the refinement step is the single biggest reason Canva composites look amateurish.
Free vs Pro
Canva Free gives you basic background removal with no manual refinement tools. For a quick Instagram post, that might be enough. Canva Pro ($13/month or $120/year) adds the erase and restore brushes, higher export quality, and unlimited removals. If you're removing backgrounds more than a few times a month, Pro pays for itself quickly.
Exporting your result
After removal, you can either drop in a new background right inside Canva or download the subject with a transparent background. For transparent output, go to Share, Download, choose PNG, and make sure "Transparent background" is checked. JPG doesn't support transparency, so PNG is the only option here.
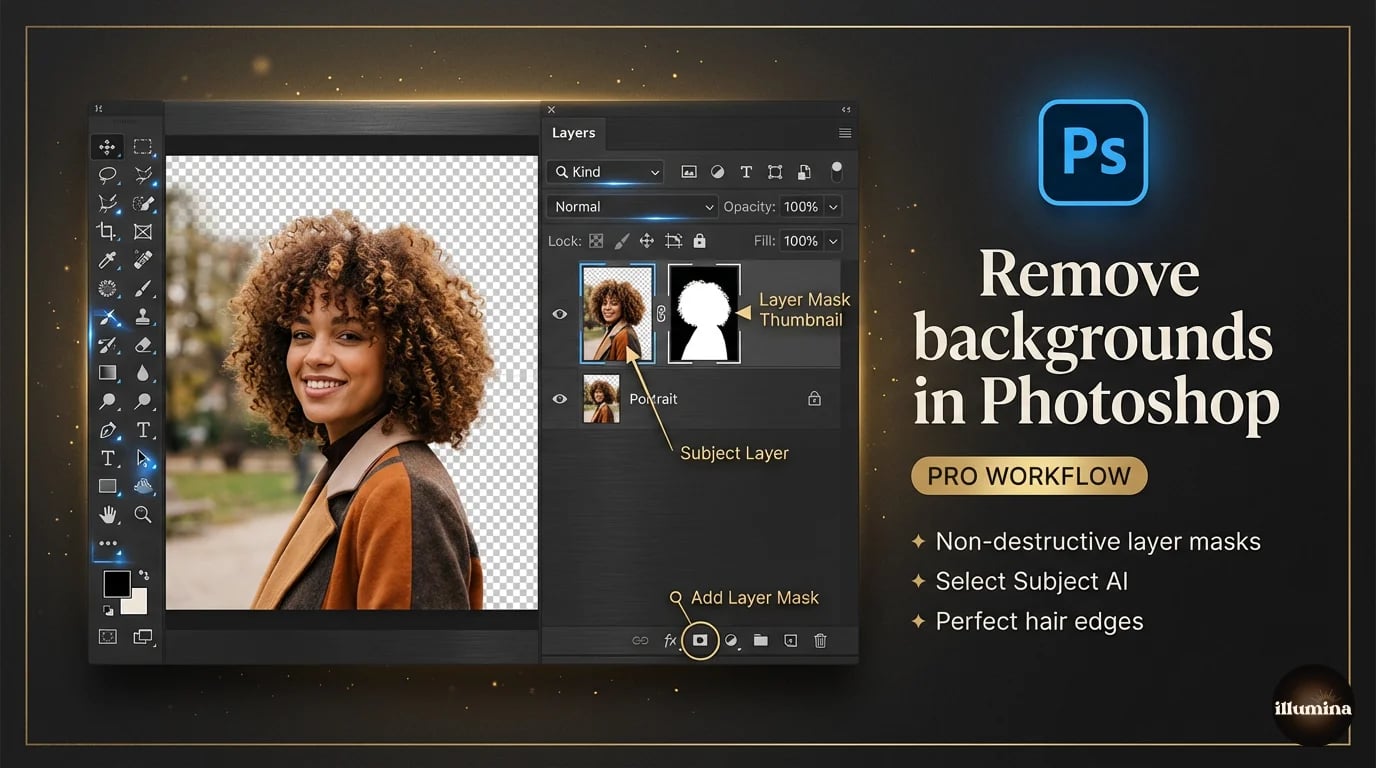
How to Remove Backgrounds in Photoshop
Photoshop gives you the most control and the best results. Full stop. If you're a photographer doing client work, this is where you should be removing backgrounds. The AI tools have gotten remarkably good in recent versions, and for the cases where AI isn't enough, manual methods give you pixel-perfect precision.
Select Subject (the fastest method)
Go to Select, then Subject. Photoshop's AI analyzes the image and creates a selection around your subject. In the 2025/2026 versions, this is genuinely impressive, especially on portraits. It handles hair reasonably well and rarely includes obvious background chunks.
After the initial selection, hit Select and Mask (or press Q for Quick Mask mode) to refine. The Refine Edge Brush is your best friend for hair. Paint along the hairline and Photoshop will figure out which strands to keep and which background pixels to drop. Set the output to "Layer Mask" so you're working non-destructively.
Quick Selection Tool
For photos where Select Subject doesn't quite nail it, the Quick Selection Tool (W) lets you paint over your subject to build a selection manually. Hold Alt/Option to subtract areas. This tool works best when there's good contrast between subject and background.
A trick that saves time: start with Select Subject, then switch to Quick Selection Tool to fix the specific areas the AI missed. You don't have to choose one method exclusively.
The Pen Tool (for precise, hard edges)
The Pen Tool is the most accurate selection method in Photoshop, but it's also the slowest. You manually trace around your subject by clicking to place anchor points and dragging to create curves. Every edge is exactly where you put it.
Use the Pen Tool for products, architecture, vehicles, and anything with clean geometric edges. Don't use it for hair, fur, or trees. You'll lose your mind trying to trace individual strands, and the result won't look natural anyway.
Color Range
Select, then Color Range. Click on the background color and Photoshop selects all similar pixels. Adjust the Fuzziness slider to expand or narrow the selection. This method is perfect for subjects shot against solid-colored backgrounds, like studio portraits on gray seamless paper or product shots on white.
Where Color Range gets tricky: if your subject contains colors similar to the background. A person in a gray shirt against a gray backdrop will give you headaches. For those situations, combine Color Range with manual selection cleanup.
Channels method (the secret weapon for hair)
This one takes practice but produces the cleanest hair extractions you'll ever see. Go to the Channels panel, find the channel with the most contrast between hair and background (usually Blue for light backgrounds). Duplicate that channel. Use Levels or Curves to push the contrast further until the hair is very dark and the background is very white. Then Ctrl/Cmd-click the channel to load it as a selection.
This method works because individual hair strands are too fine for most selection tools, but they do show up as contrast differences in color channels. It's slower than Select Subject but produces noticeably better results for flyaway hair, curly hair, and fine wisps that AI tools still struggle with.
Layer masks vs. destructive editing
Always use layer masks. Always. A layer mask hides background pixels without deleting them. You can refine your selection at any point by painting on the mask with black (hide) or white (reveal). If you use the Eraser tool instead, those pixels are gone permanently. There's no going back two days later when the client asks for a slightly different crop.
Transform Your Photos
Give Your Photos the Wow Factor
Browse our collection of premium digital photo backdrops. 50 high-resolution print-ready backgrounds in each pack. Instant download.
Browse Backdrops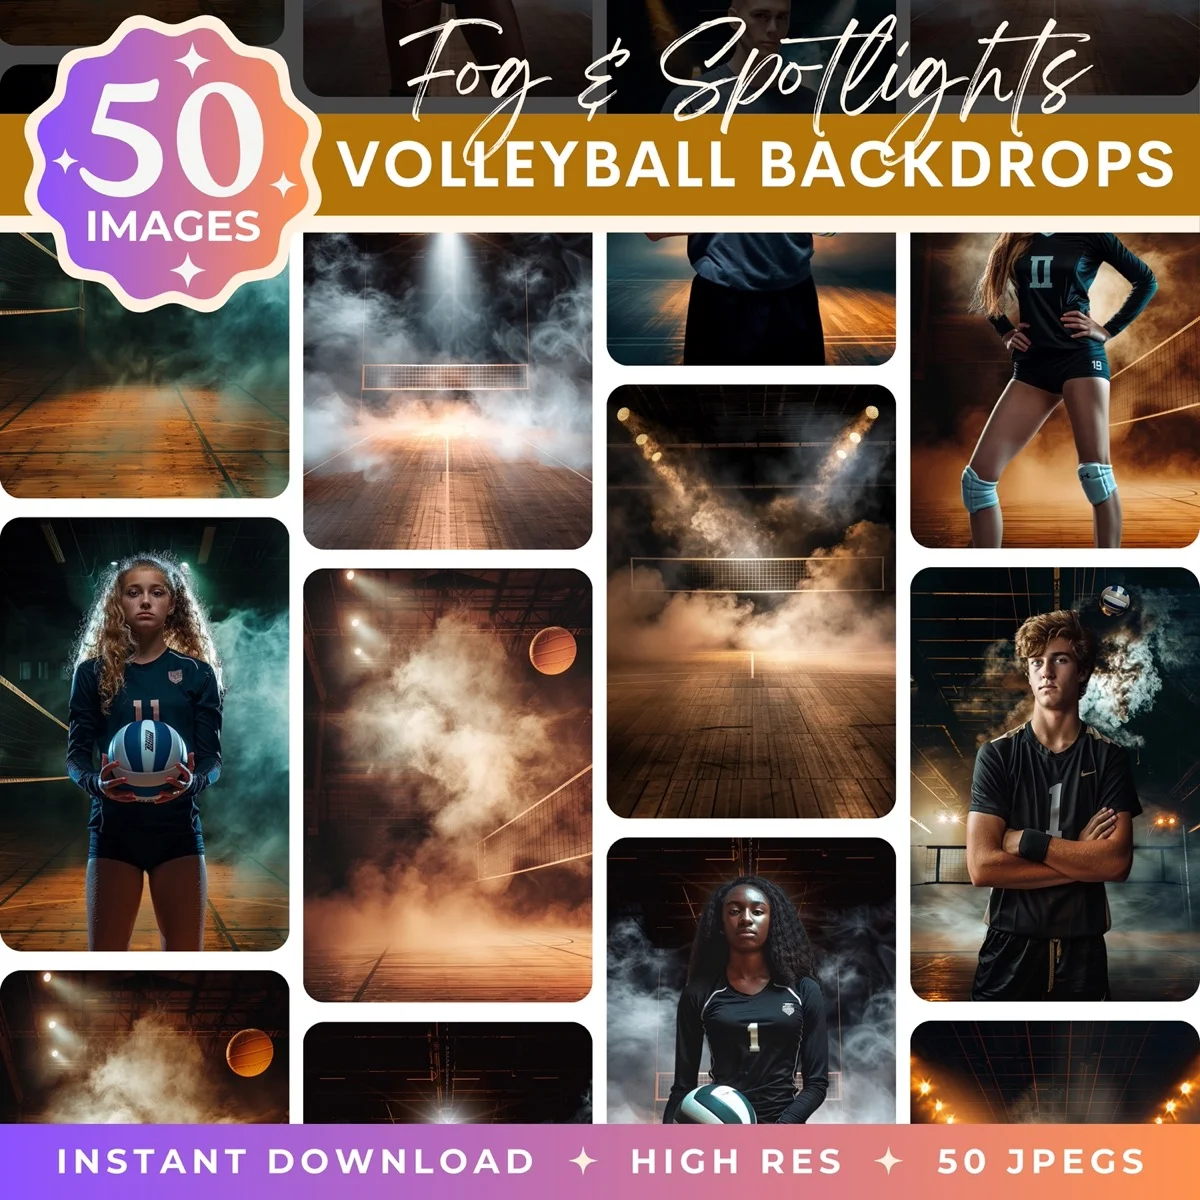

How to Remove Backgrounds on iPhone and Android
Sometimes you're not at your computer. Maybe you need to remove a background from your phone for a quick social media post or a listing photo. Both iOS and Android have solid options now.
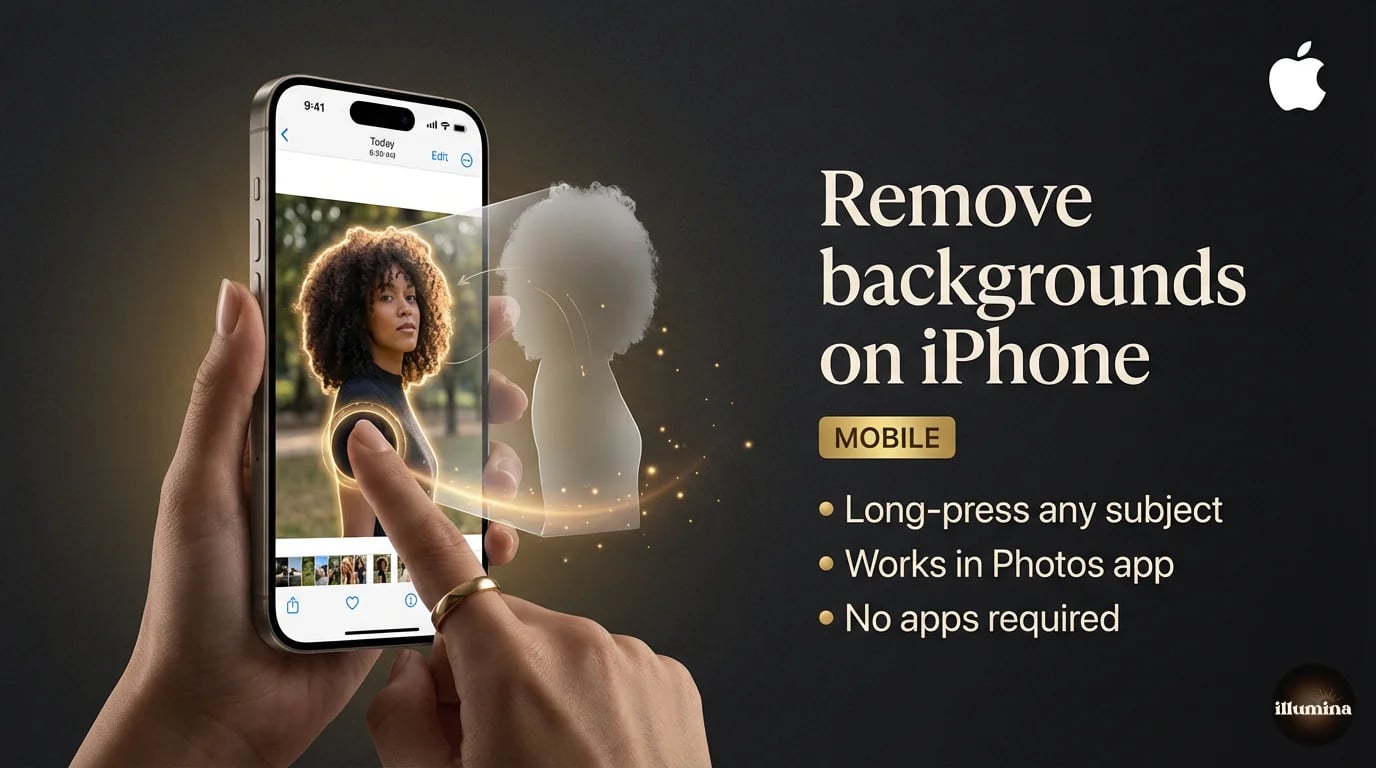
iPhone (iOS 16 and later)
Apple built background removal directly into iOS. Open any photo in the Photos app, long-press on the subject, and you'll see it lift off the background with a subtle glow effect. Tap "Copy" or "Share" to use the cutout. It works in Safari on images too, and in the Files app.
The quality is decent for social sharing. Fine hair detail gets lost, and it sometimes clips edges too tightly on darker subjects. For professional work, you'll still want Photoshop. But for texting a friend a sticker of your dog, creating a quick composite for your Instagram story, or dropping a headshot into a presentation on the go? It's genuinely useful. You can copy the cutout directly into Messages, Notes, or any other app that accepts images.
Android
Google Photos added a similar feature called "Cutout" in the Magic Editor. Samsung phones have their own version in the Gallery app (long-press on a subject, then tap the scissors icon). Pixel phones tend to produce the best results on Android thanks to Google's AI processing, but most recent Samsung and OnePlus devices do a respectable job. Quality varies by device and software version, and none of them match what you'll get from a desktop tool on a detailed extraction.
PhotoRoom mobile app
The best dedicated background removal app for both platforms. PhotoRoom's mobile app uses the same AI as their web tool but is optimized for phone cameras. It's especially good for product photos, with batch processing if you're shooting inventory. The free version includes a watermark; the paid version removes it and adds extra editing features.
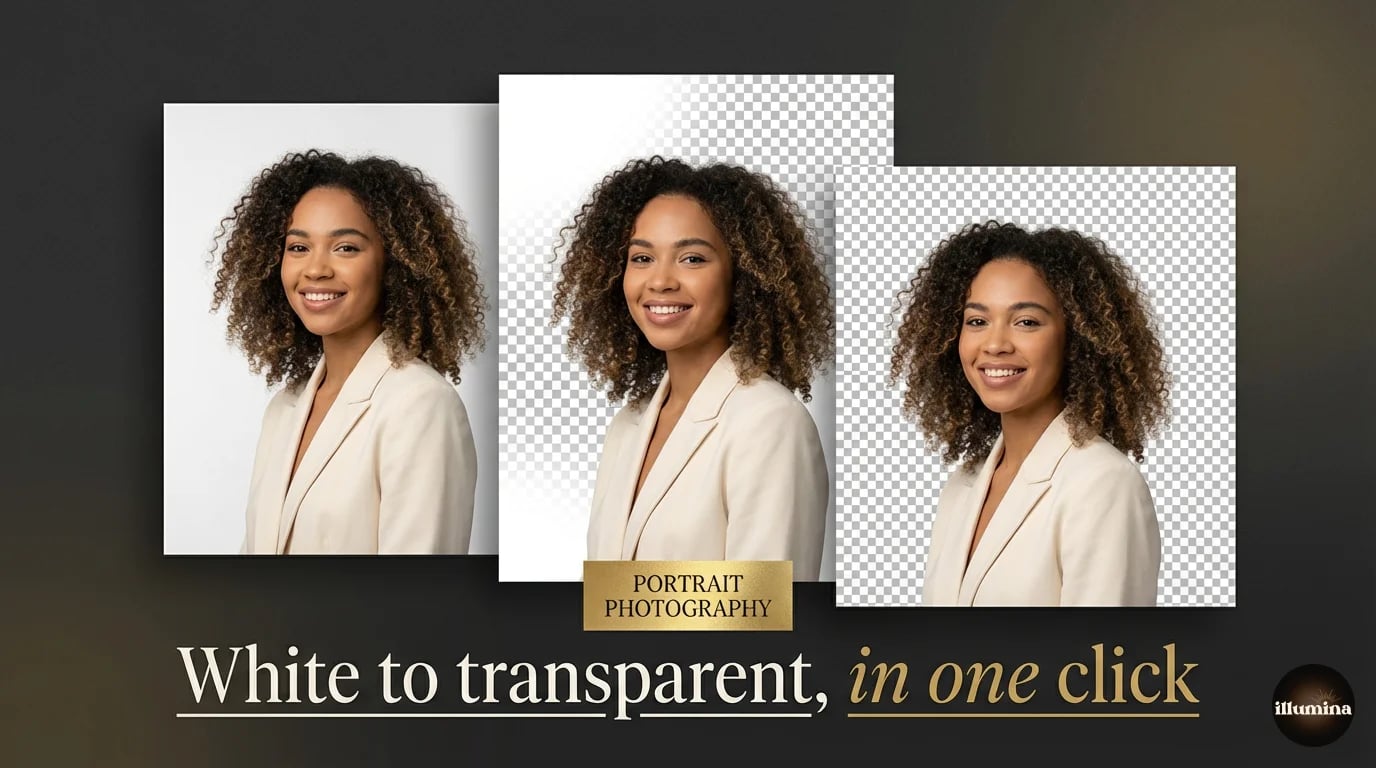
How to Remove White Backgrounds Specifically
This deserves its own section because the search intent is different. You're probably working with product photos, logos, or scanned artwork on a white background and need a transparent PNG.
In Photoshop
The Magic Wand Tool (W) is your fastest option for white backgrounds. Click on the white area with a Tolerance of 10-20. If the white isn't perfectly uniform (spoiler: it rarely is in photos), bump the tolerance up to 30-40. Check "Contiguous" if you only want to select connected white areas, or uncheck it to grab all white pixels including those trapped inside the subject.
After selecting, invert the selection (Ctrl/Cmd+Shift+I) so your subject is selected instead of the background. Add a layer mask. Done.
For product photos with subtle shadows on the white background, you might want to keep those shadows. They add realism. In that case, use Select, Color Range, click on the white, set Fuzziness to about 60, then invert. The shadows will be partially transparent in the mask, which looks natural when placed on a new background. This technique is especially useful for e-commerce photos where you're swapping a white background for a lifestyle scene but want the product to still feel grounded.
In Canva and free tools
Honestly, the same one-click tools work fine for white backgrounds. Remove.bg and Canva both handle solid white backgrounds easily since the contrast is usually very high. The only catch is that near-white areas on your subject (like a white shirt or white product packaging) sometimes get incorrectly removed. Check the edges carefully.
Transparent PNG export
Whatever tool you use, the critical step is exporting correctly. You need PNG format for transparency. JPEG doesn't support transparent pixels and will fill your background with white (which defeats the entire purpose). In Photoshop, use File, Export, Export As, and choose PNG. In Canva, tick the "Transparent background" checkbox before downloading as PNG.
What to Do After Removing the Background
You've got your subject cleanly extracted. Now what? A subject floating on a transparent background isn't a finished image. You need to put something behind it.

Solid colors and gradients
The simplest option. A solid white or neutral background works for product listings. A gradient adds slightly more visual interest without being distracting. In Photoshop, create a new layer below your subject, fill it with your chosen color or gradient, and you're done.
Textured and abstract backgrounds
For social media graphics, presentations, or creative projects, textured backgrounds add personality. Think paper textures, bokeh effects, watercolor washes, or geometric patterns. Canva has a massive library of these built in.
Professional digital backdrops
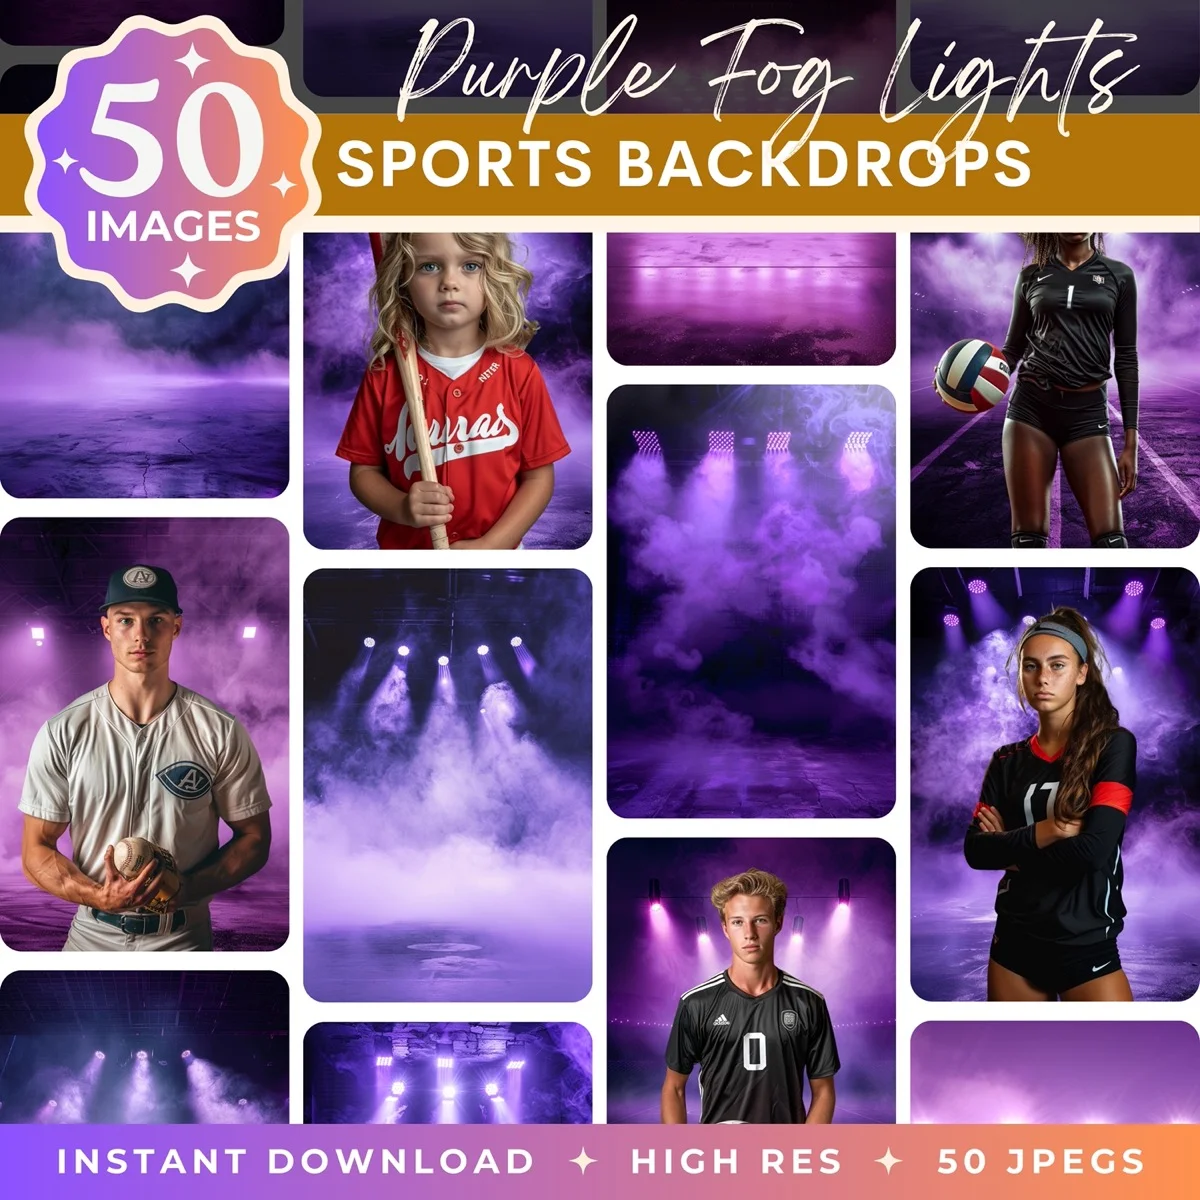
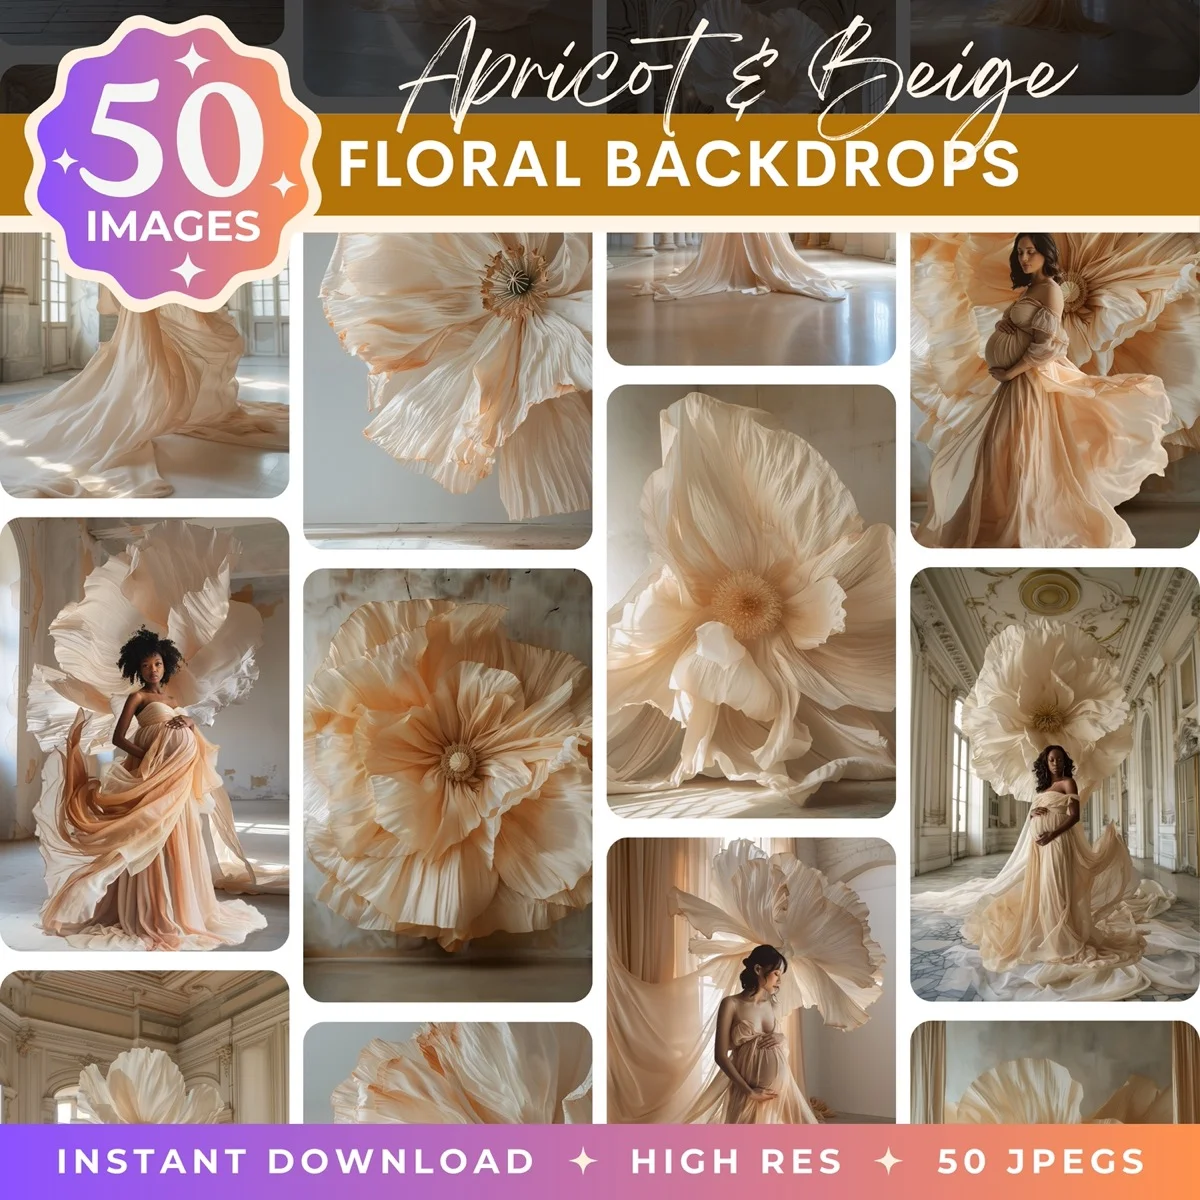
For photographers doing portrait, sports, maternity, or graduation photography, this is where background replacement gets really interesting. Professional-grade digital backdrop packs give you dozens of high-resolution scenes, things like dramatic fog-filled stadiums, dreamy floral gardens, elegant studio setups with podiums and archways, all designed specifically for compositing subjects into.
Photographers use these for everything from youth baseball team photos to maternity sessions to senior portraits. One pack of 50 images can serve an entire season of client work, creating that high-end, editorial look without renting expensive locations or fighting unpredictable outdoor conditions. The key is choosing backdrops with resolution high enough for large prints (6000px or higher) and lighting that's designed to match standard studio setups.
Studio-quality digital backdrops
Photographers use Illumina Backdrops for curated packs with 50 high-resolution images in each set. Sports, maternity, floral, graduation, and studio themes, all print-ready and instant download.
Browse our full collection →Matching your subject to the new background
Regardless of which background you choose, spend two minutes on color matching. Your subject was lit and white-balanced for the original environment. Dropping it onto a completely different scene without adjustments will look obviously composited. At minimum, match the color temperature (warm or cool) and the overall brightness. Even a small adjustment makes a significant difference.
Tips for Getting Clean Background Removals
The best background removal starts before you even open your editing software. How you photograph the subject determines 80% of the final quality.
Shoot against the right background
Solid gray is the gold standard for portrait photography compositing. It doesn't spill color onto your subject the way green screens do (that greenish tint on skin and clothing is called "green spill" and it's a real pain to remove in post). Gray also provides enough contrast for AI tools to work accurately without blowing out highlights. If you don't have a gray backdrop, a clean white wall works almost as well. Even a bedsheet stretched flat behind your subject is better than a cluttered room.
Avoid busy, detailed, or multi-colored backgrounds. Yes, modern AI can extract subjects from complex scenes. But the edges will never be as clean as a shot against solid color. If you know you'll be removing the background, set up the shot accordingly.
Lighting matters enormously
Even, diffused lighting on your subject produces dramatically cleaner extractions. Hard shadows create dark areas that AI tools sometimes confuse with the background. Bright hotspots on the background create uneven tones that make selection harder. Two softboxes at 45 degrees, or a large window with a diffusion panel, give you the cleanest results.
Also: light your background separately from your subject. A slight gap between the subject and the background, combined with a backlight or rim light, creates a natural edge of light that makes extraction almost trivially easy. Studios call this "edge separation" and it's the single best thing you can do for clean composites.
Hair and fine detail
Hair is the hardest part of any background removal. Curly hair, flyaway strands, fine baby hair, all of these give AI tools trouble. Some strategies that help:
- Keep hair styled close and controlled during the shoot if compositing is planned
- Use a backlight or hair light to create contrast between hair and background
- In Photoshop, combine Select Subject with the Channels method for best results
- Accept that some flyaway strands will be lost. Perfection here isn't realistic
Common mistakes that ruin background removals
- Leaving a thin halo of the original background around the subject (zoom in to 200% and check)
- Over-refining edges until they look artificially smooth (real hair and clothing have texture)
- Forgetting to check the result against multiple background colors (an edge that looks fine on white might show fringing on dark backgrounds)
- Using JPEG compression after removal, which introduces artifacts around the edges of transparent areas
- Not saving the layered file, so you can't go back and refine later
Which Method Should You Actually Use?
After all that, here's the honest recommendation based on different situations:
You need a quick removal for social media or a presentation: Use remove.bg or the iPhone long-press trick. Takes seconds, quality is fine for screen viewing.
You're a small business owner removing backgrounds for product photos: PhotoRoom, either web or mobile. The batch processing and built-in editing tools are designed for exactly this workflow.
You're a photographer doing client composites: Photoshop. Always. The combination of Select Subject for speed and manual tools for refinement gives you the quality your clients are paying for. Pair that with professional digital backdrops and proper color matching, and you'll produce work that stands apart.
You want decent results without learning complex software: Canva Pro. The BG Remover plus Canva's design tools give you a complete workflow for background removal and replacement in one place.
No single tool is best for everyone. The right choice depends on your quality requirements, how many images you're processing, and what you're doing with the result afterward. Start with the free options, and upgrade to more powerful tools as your needs grow.
One final thought: background removal is only half the job. What you replace the background with determines whether the final image looks amateur or professional. A cleanly extracted subject on a poorly chosen background still looks bad. Invest as much thought in choosing your new background as you do in removing the old one.
Transform Your Photos
Give Your Photos the Wow Factor
Browse our collection of premium digital photo backdrops. 50 high-resolution print-ready backgrounds in each pack. Instant download.
Browse Backdrops

