

In this guide
- Quick Answer
- Why Object Removal Is Different from Background Removal
- Method 1: Photoshop's Remove Tool
- Method 2: Lightroom's Remove Tool
- Method 3: iPhone Photos App (Clean Up)
- Method 4: Free Web Tools (Canva, Photoroom, Cleanup.pictures)
- The Hard Cases and How to Handle Them
- Removing People from Group Photos
- Removing Backgrounds Entirely vs Removing Specific Objects
- Generative Fill Prompts That Work
- When to Move to Manual Retouching
- Speed vs Quality: Which Tool Wins by Use Case
- Ethics, Disclosure, and Client Expectations
- Common Mistakes
- What Comes Next
Quick Answer
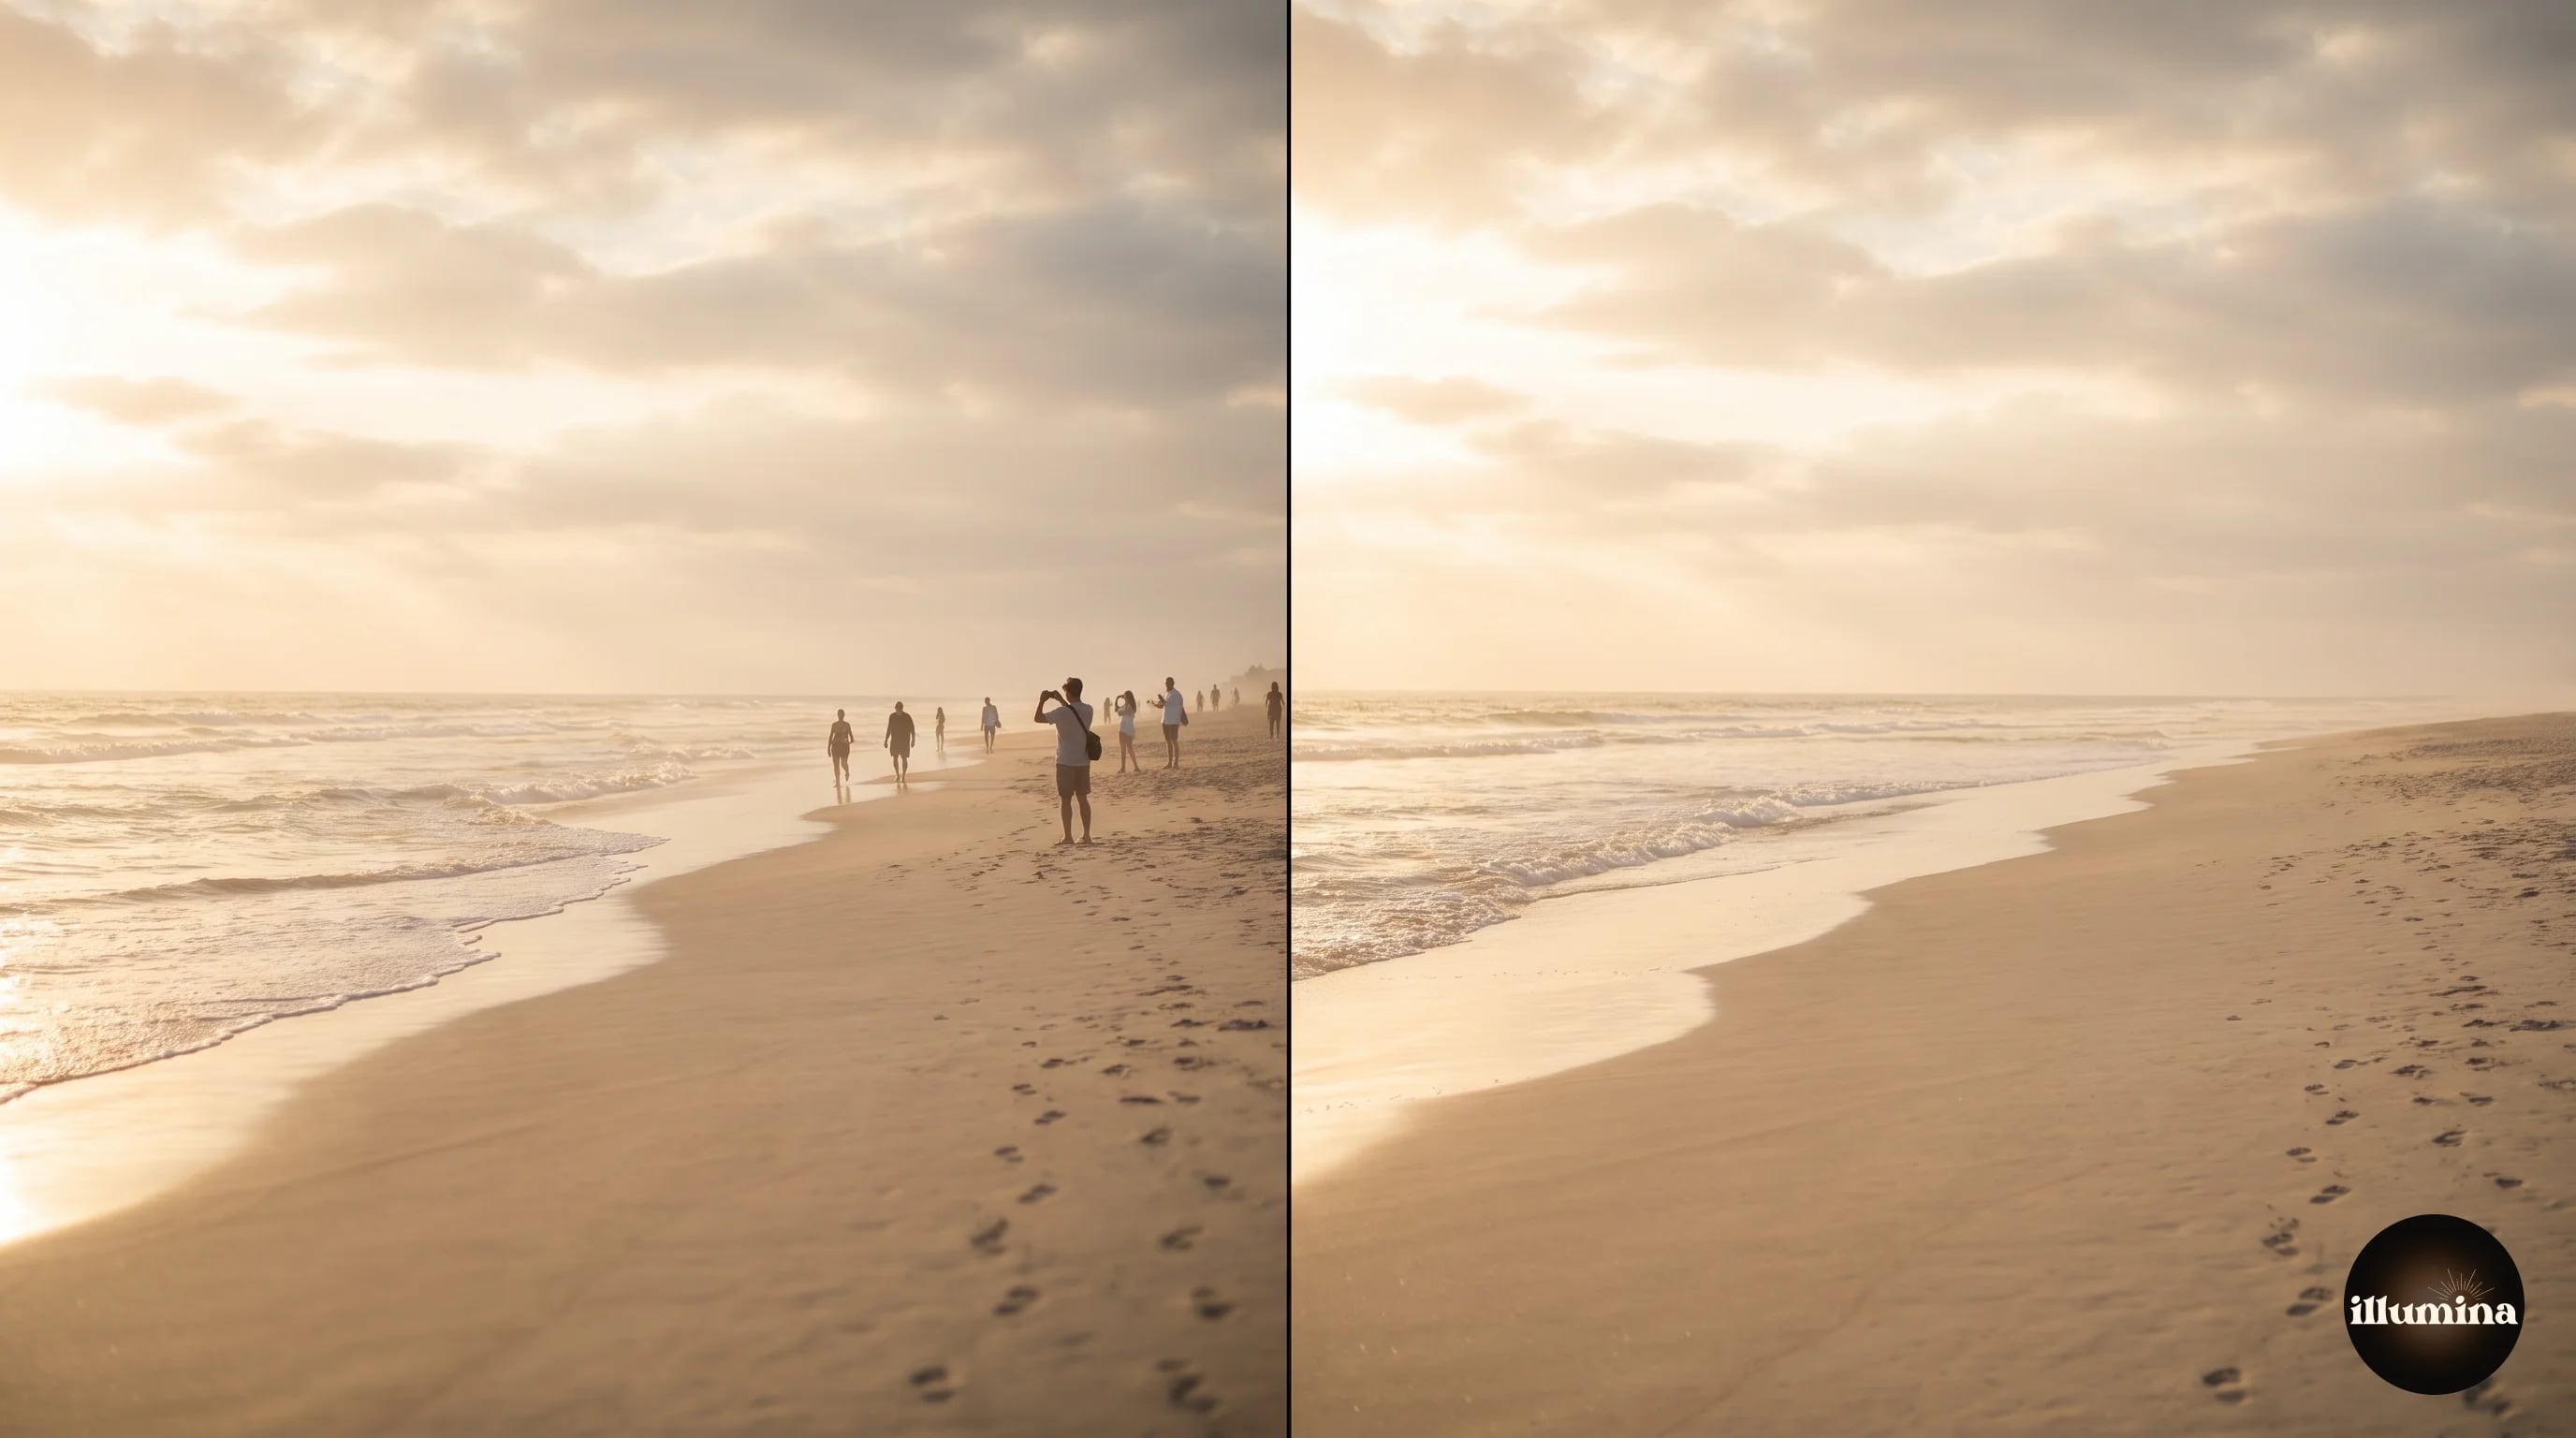
The fastest way to remove an object from a photo in 2026 is the Generative Remove or Clean Up tool in whatever editor you already use. Photoshop's Remove Tool (Spot Healing Brush with Generative Fill) handles almost any object, Lightroom's Remove Tool does the same inside your RAW workflow, the iPhone Photos app has a Clean Up tool built into iOS 18.1 and later, and free tools like Photoroom and Canva both have competent object erasers. Paint over the object, the AI generates replacement pixels, and you get a clean photo in seconds.
This guide covers every method, when to use which, and how to get clean results on the hard cases (people in backgrounds, reflections, dense patterns, text, and photobombers).
Why Object Removal Is Different from Background Removal
Background removal and object removal sound similar but use different AI models. Background removers segment the subject from everything else, then delete everything else. Object removers mask the thing you do not want, then synthesize new pixels to fill the hole. The first is a cutout operation. The second is a generation operation.
That difference matters because it tells you which tool to reach for. If you want to isolate a subject on a transparent PNG, use a background remover (see our complete background removal guide). If you want to keep the photo intact but erase something inside it, use an object remover. You cannot use one for the other job, and most people mix them up.
The other key difference is what the AI has to do. Background removal is a classification problem: subject or not subject. Object removal is a generative problem: what would this sand, sky, wall, or floor have looked like if the object were never there? That second problem is harder, which is why results are more variable.
Method 1: Photoshop's Remove Tool
Photoshop's Remove Tool launched in 2023 and became the default for most photographers within a year. It replaced the older Content-Aware Fill workflow, which required you to make a selection and then run a Fill dialog. The Remove Tool works more like a brush.
How to use it. Open your photo, select the Remove Tool from the toolbar (keyboard shortcut J, shared with the Spot Healing Brush group). Paint over the object you want gone. Photoshop runs Generative Fill in the background and replaces the painted area with AI-generated pixels that match the surrounding image.
The tool works in two modes. The default uses a local content-aware fill that is fast and works offline. Turning on "Generative AI" in the options bar sends the painted area to Adobe's cloud and runs Firefly, which takes three to five seconds but produces dramatically better results on hard cases.
Use local fill for small objects against uniform backgrounds (a lens cap on a wood floor). Use Generative AI for anything complex (a person on a busy street, a tree line behind a portrait subject).
Paint a little past the edge of the object. The AI needs buffer room to blend its replacement pixels into the surrounding image. If you paint exactly to the edge, you will see a visible seam. A 5 to 10 pixel margin past the object gives the fill something to work with.
The Remove Tool is destructive by default (it writes to the current layer). Always duplicate your layer first, or convert to a Smart Object so you can undo if the result is bad. Muscle memory for this saves hours of reshoot time over a year.
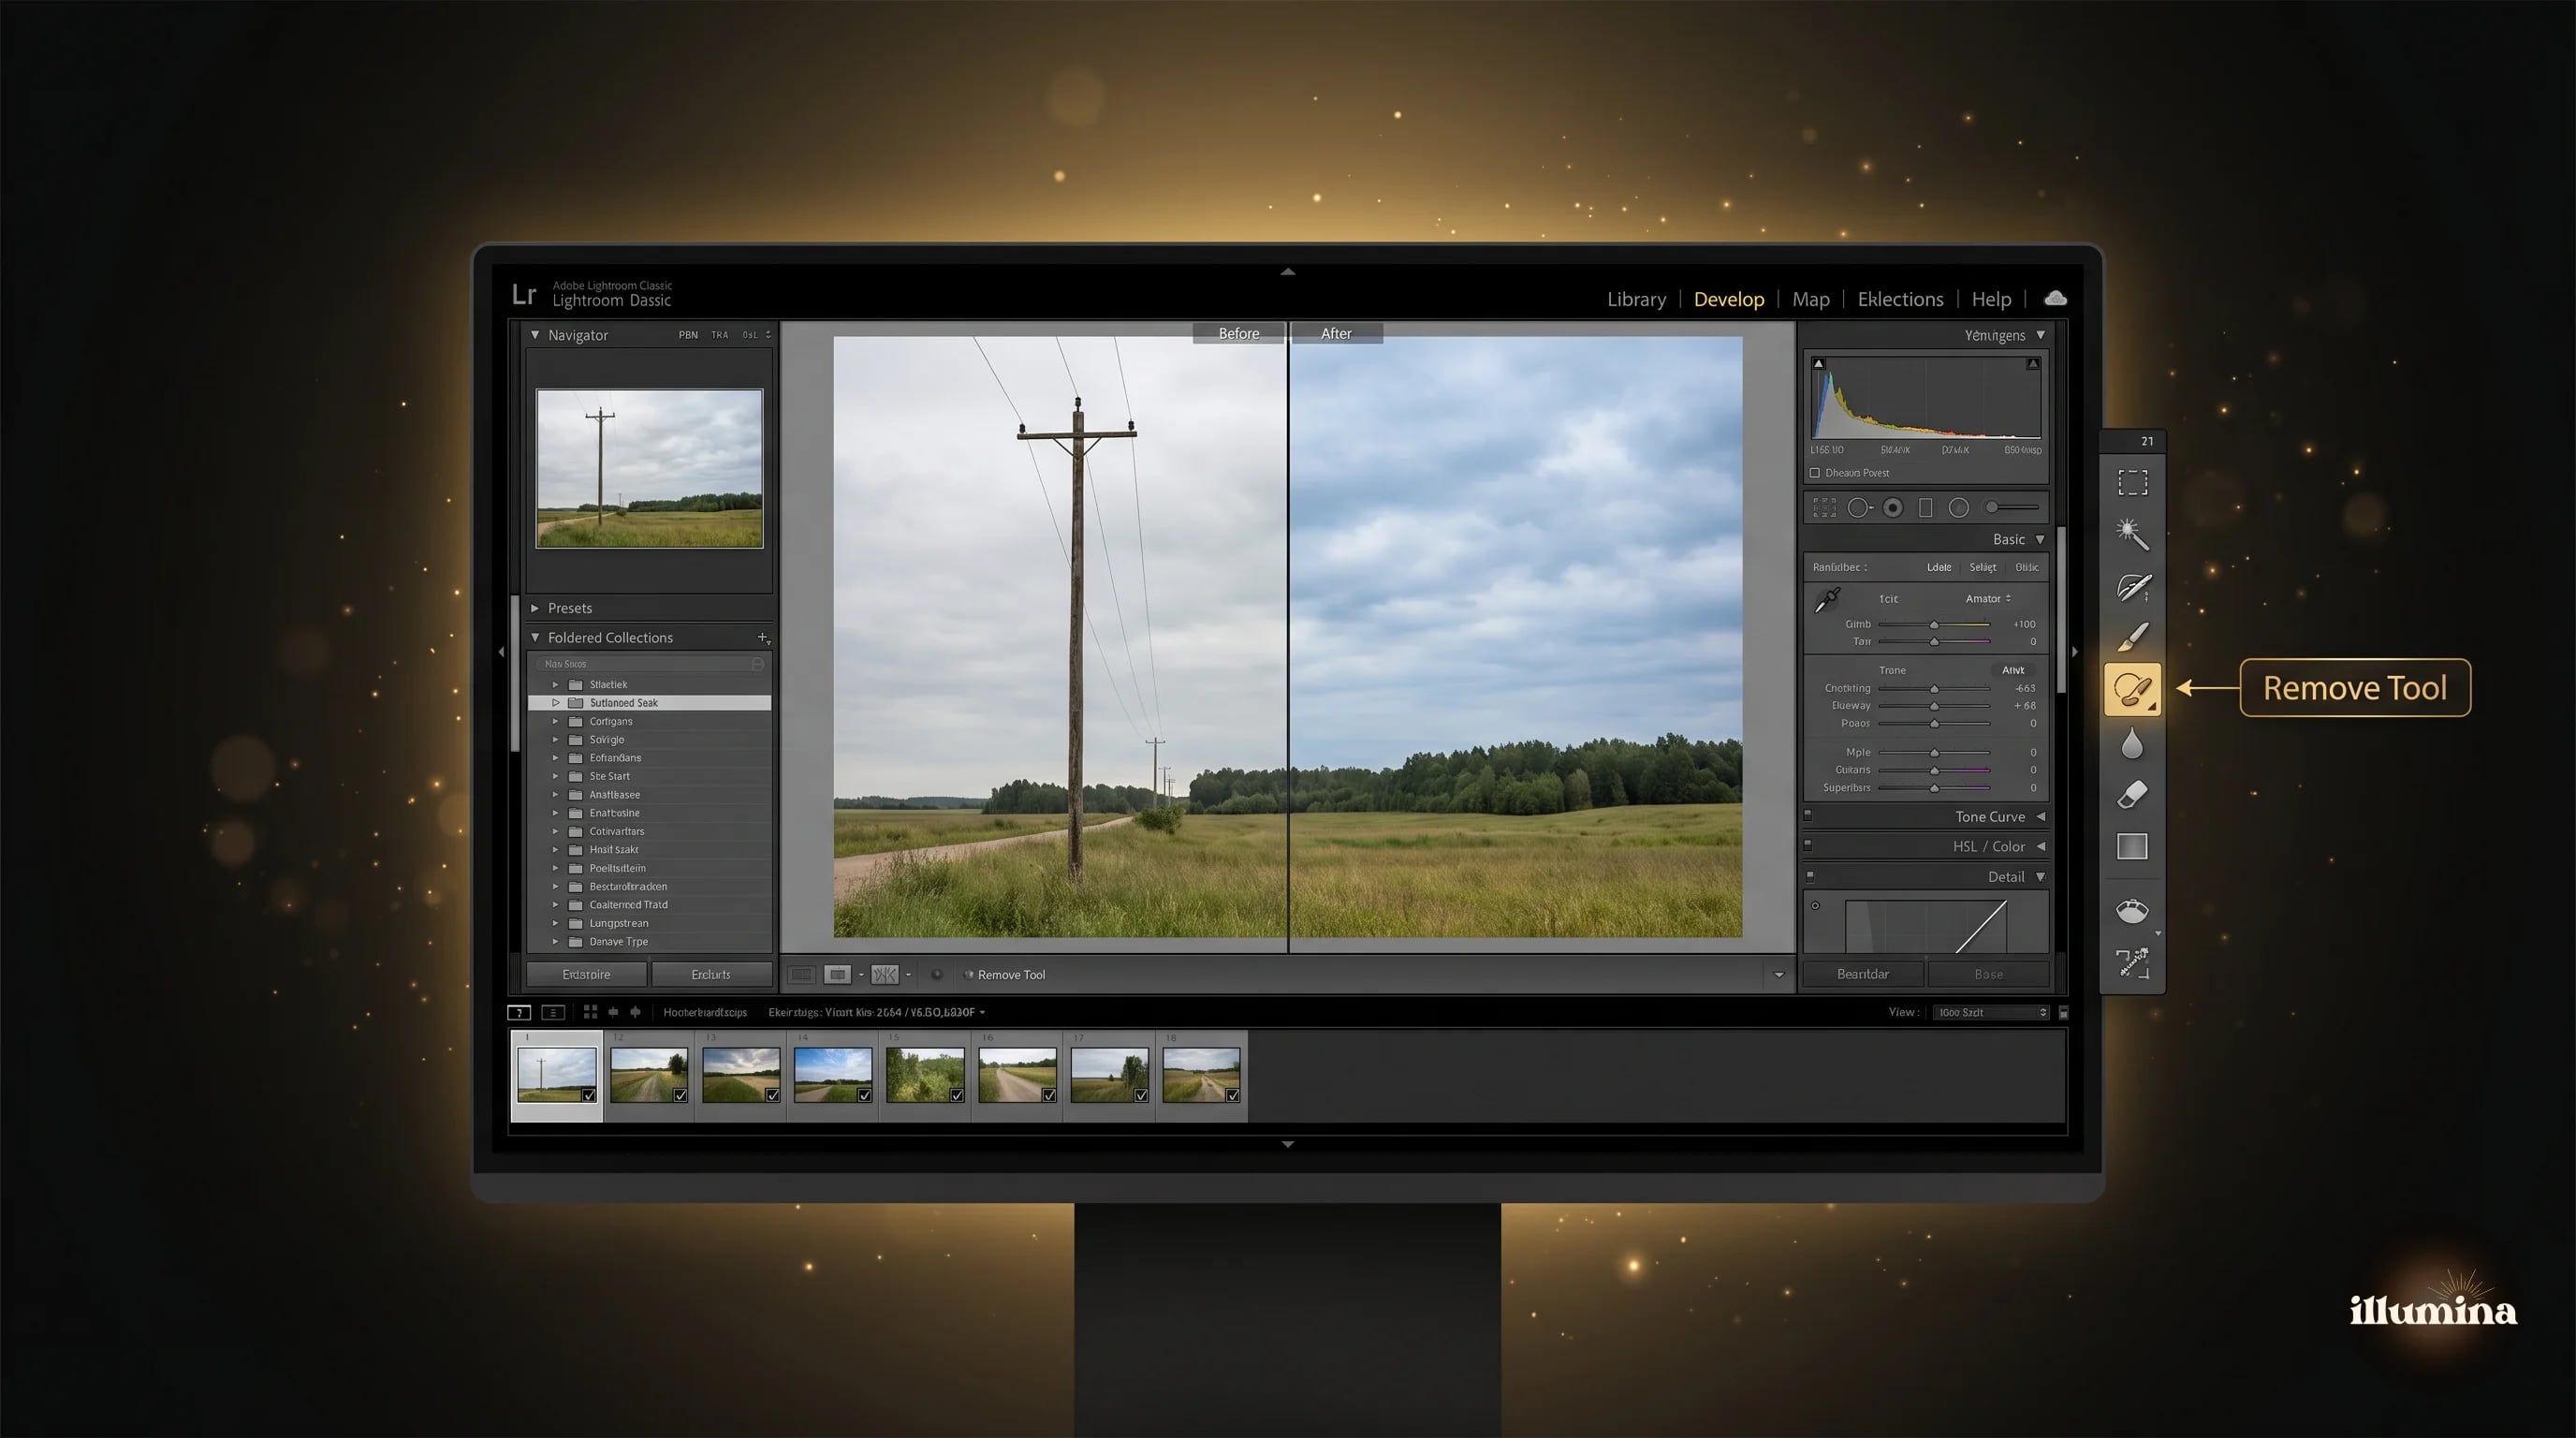
Method 2: Lightroom's Remove Tool
Lightroom's Remove Tool is the same AI model as Photoshop's, wrapped in a non-destructive Lightroom workflow. You paint over the object, Lightroom masks it, and the result stays as an edit that you can refine or undo at any time without flattening pixels.
This is the right tool for anyone who processes RAW files as the primary workflow. You can remove a passerby in the background of a family portrait without ever leaving Lightroom, and the removal travels with the image metadata. If you later change your mind, you can turn it off.
Performance is slightly slower than Photoshop because Lightroom re-renders from the RAW each time. On a modern Mac or PC, a typical removal takes about eight seconds end-to-end.
Method 3: iPhone Photos App (Clean Up)
Since iOS 18.1, iPhones with Apple Intelligence (iPhone 15 Pro and newer) have a Clean Up tool built into the stock Photos app. Open a photo, tap Edit, tap the Clean Up icon, and paint over what you want gone. The AI runs on-device.
Results are impressively good for something that ships free with the operating system. For quick cleanups (a garbage can in the background of a vacation shot, a person walking through a landscape), it beats launching a computer. It struggles on dense urban scenes and on objects that take up more than about 20 percent of the frame.
On iPhones without Apple Intelligence, the older Markup tool lets you draw over things but does not regenerate pixels. For those devices, use a third-party app like Lensa or Photoroom, both of which have iPhone apps with free object removal.
For the full mobile background removal workflow, see our iPhone background removal guide, which covers the related Clean Up workflow in more detail.
Method 4: Free Web Tools (Canva, Photoroom, Cleanup.pictures)
Several free browser-based tools handle object removal without an install. The three worth knowing.
Canva Magic Eraser. Free with a Canva account. Upload the image, paint over the object, export the result. Quality is solid on simple backgrounds, less so on complex scenes. Canva also offers a Magic Expand feature that works in the opposite direction (extending the frame).
Photoroom. The web and mobile app includes an object removal tool that works well on product photography. Strongest on white-background product shots where you need to remove packaging, price tags, or stray hair.
Cleanup.pictures. A single-purpose tool. Upload, paint, download. The free tier limits export resolution, which is the standard pattern for free AI tools in this space. For paid use, the Pro tier is $7 a month.
For the overall free tool landscape including background removers, object erasers, and general photo editors, check our best free background remover tools comparison.
The Hard Cases and How to Handle Them
Every object removal tool fails on the same five categories. Knowing what they are tells you when to switch tactics.
Reflections. If you paint out a person standing in front of a window, the AI often removes the person but leaves their reflection in the glass. You have to paint both. Go around the photo carefully.
Shadows. Same problem. Removing a lamp post removes the post, not the shadow it casts on the pavement. Paint the shadow separately.
Dense crowds. Removing one person from a crowd is easy. Removing a crowd and rebuilding the background from scratch is a generative rebuild, not a removal. Generative AI can do this, but the results look too smooth and uniform. Keep expectations low.
Text and signage. Erasing printed text on a storefront is painful because the AI often generates new fake text that looks like garbled letters. Paint slightly past the text, or use the generative option with a prompt like "blank storefront wall."
Patterns with periodicity. Tile floors, brick walls, and wood grain require the AI to match the repeating pattern. Results are usually passable but visible under close inspection. For high-end retouching, a manual clone stamp pass cleans up the tell-tale seams.
Zoom to 100 percent before accepting any AI object removal. At zoomed-out view, fills look cleaner than they really are. At 100 percent, you will see where the AI got confused: blurry patches, phantom shapes, duplicated pattern edges. That is the moment to decide whether to re-run or to manually clone-stamp the fix.
Transform Your Photos
Give Your Photos the Wow Factor
Browse our collection of premium digital photo backdrops. 50 high-resolution print-ready backgrounds in each pack. Instant download.
Browse Backdrops


Removing People from Group Photos
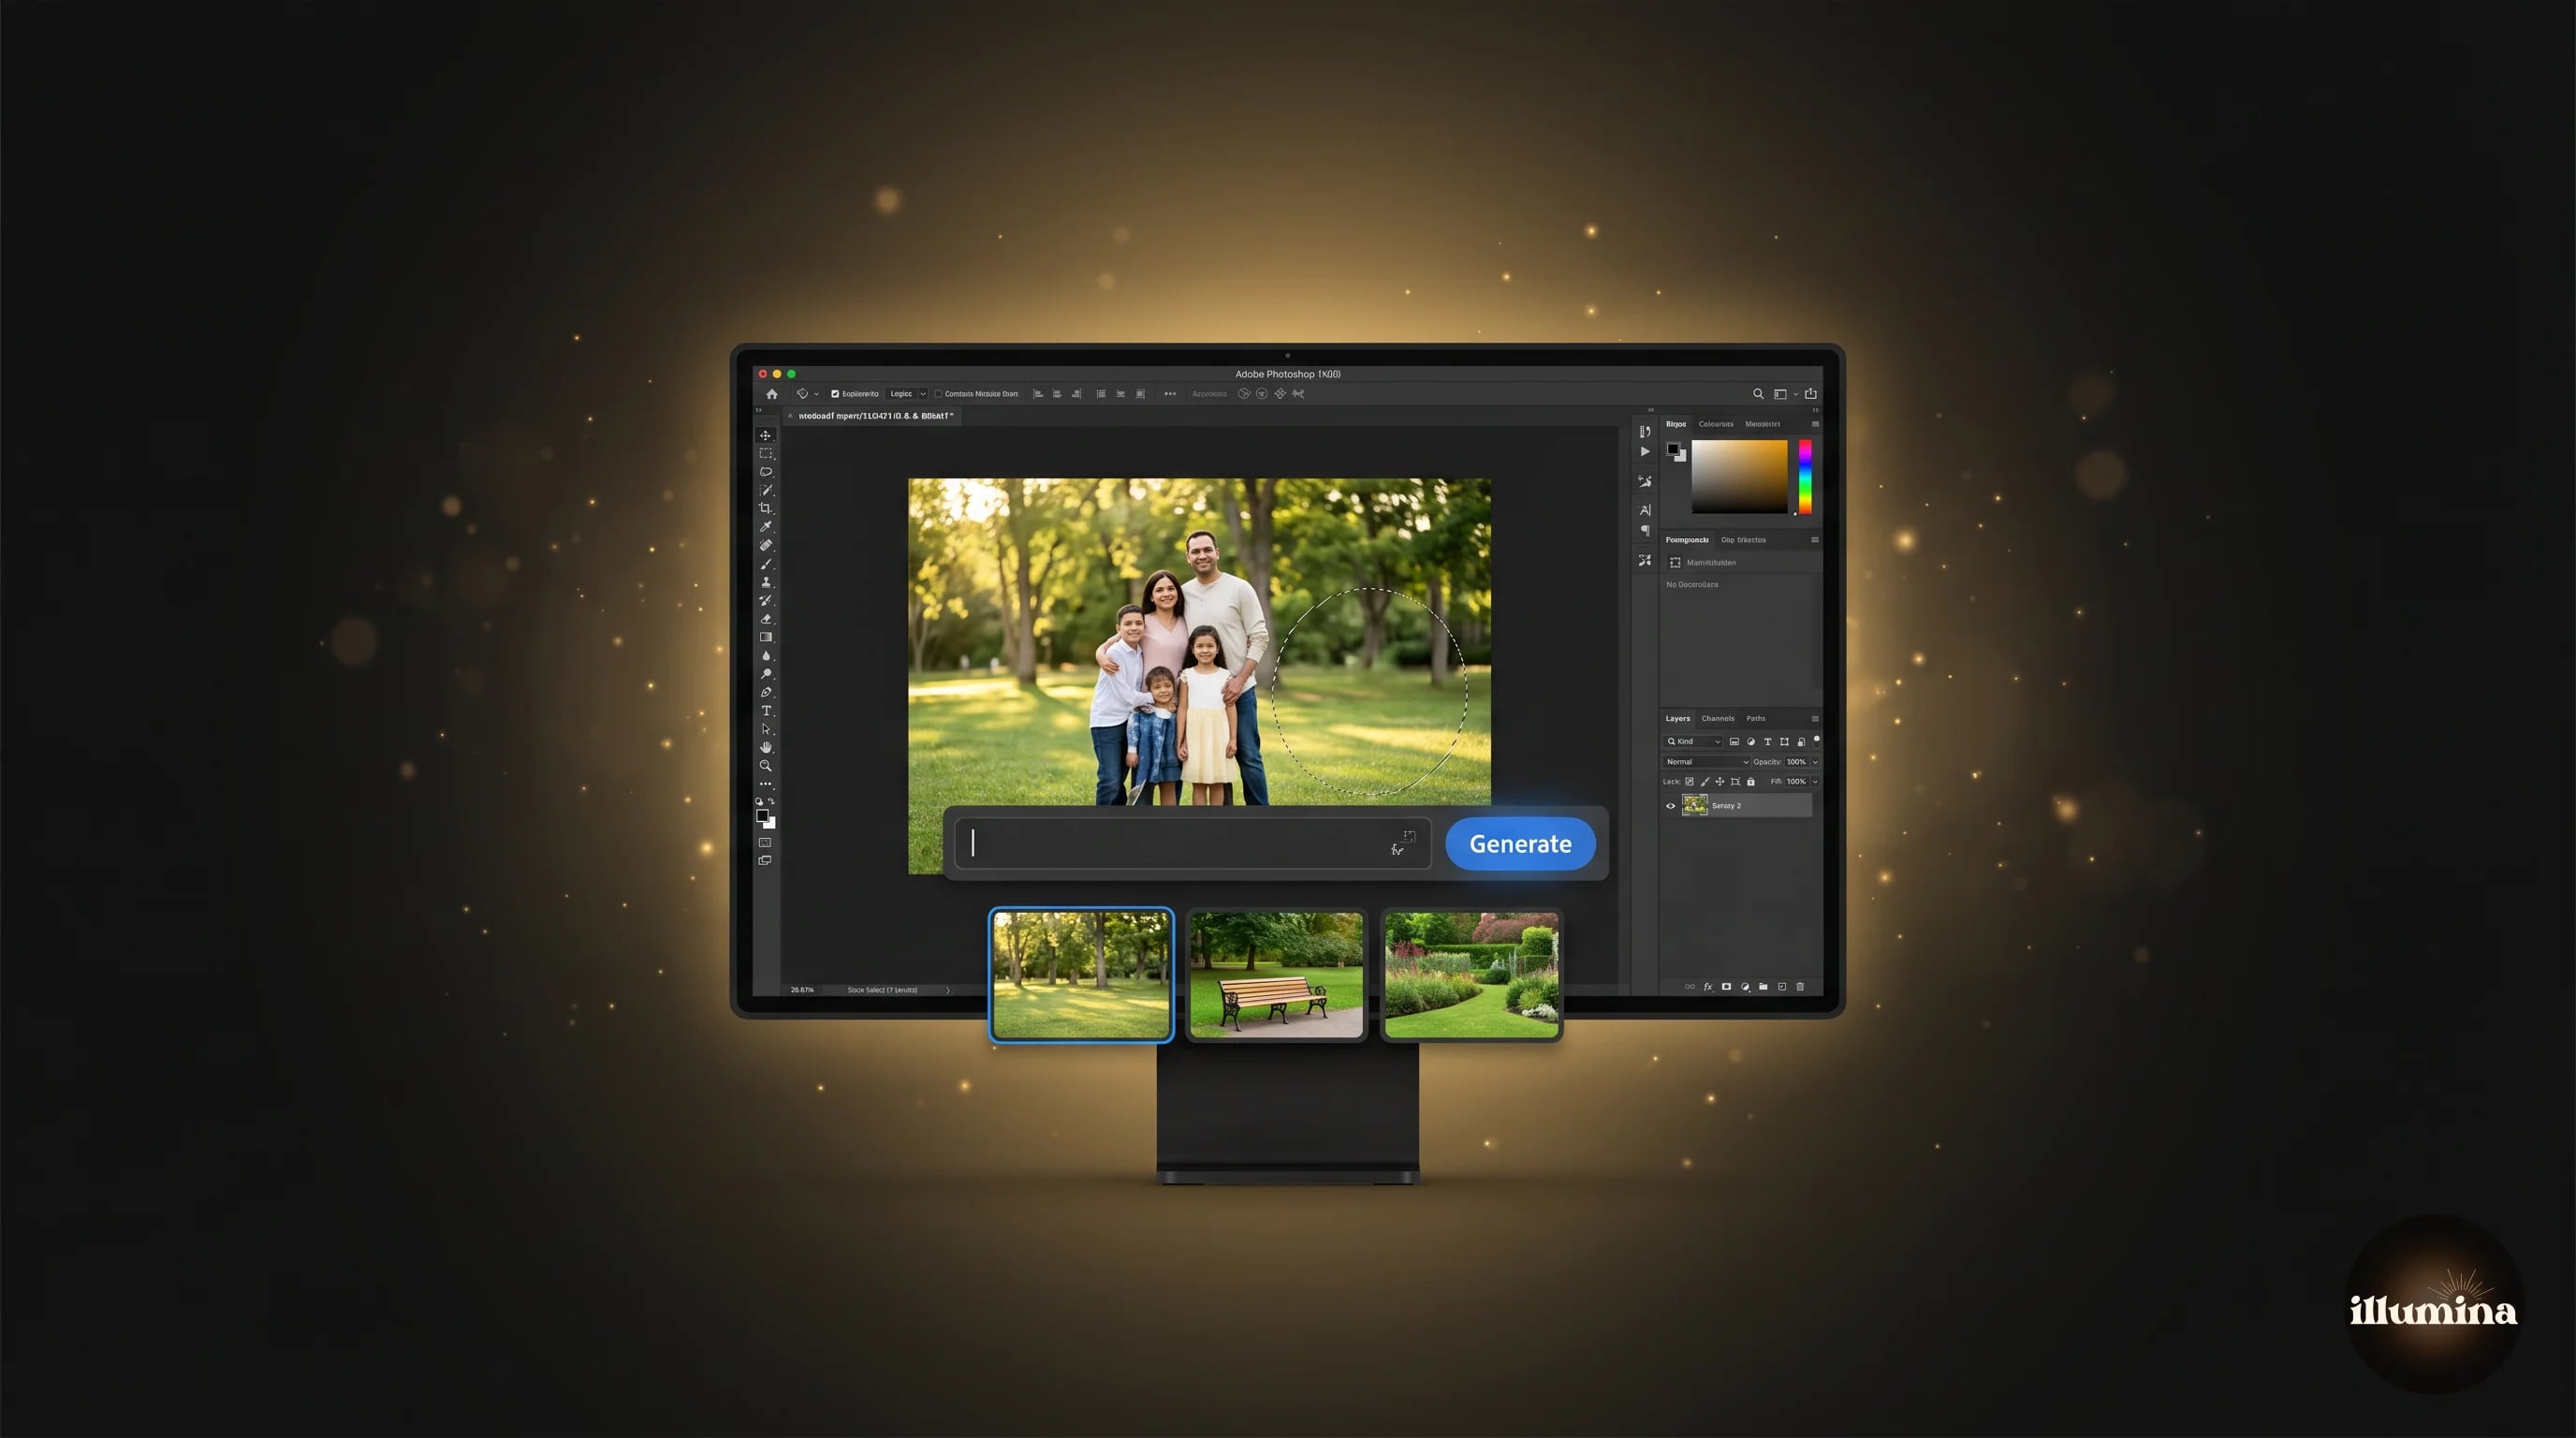
A common ask: take a group photo and remove one person. The best result almost always comes from Photoshop's Generative Fill, not a one-click eraser. Here is the workflow.
Select around the person with a generous margin using the Lasso Tool. The selection should extend about ten percent past the edge of the person in every direction, which gives the fill extra pixels to analyze. Hit Delete (or Backspace), then click Generative Fill in the contextual task bar without typing a prompt. Photoshop runs Firefly and returns three variations. Pick the best one.
Do not type a prompt unless the background is very complex. An empty prompt tells Firefly to match the surroundings, which is what you want. A typed prompt introduces bias that often produces an out-of-place result.
If none of the three variations work, click Generative Fill again to get three more. It is fast and free to keep trying.
Removing Backgrounds Entirely vs Removing Specific Objects
Sometimes the cleanest fix is to remove the entire background rather than try to erase individual objects. If a portrait has three distracting things in the background, it is often faster to cut out the subject, drop them onto a new clean backdrop, and skip the object removal step entirely.
This is especially true for sports photography, family portraits, and maternity sessions where you have a clear foreground subject and a busy or compromised background. We build digital backdrops at Illumina Backdrops specifically for this workflow. Rather than struggle to remove five objects from a gym wall or a park background, cut out the subject and drop them onto a clean studio or stadium backdrop.
The decision between "fix the background" and "replace the background" usually depends on how much of the original background you need to preserve. If the goal is a natural look that still reads as the original location, use object removal. If the goal is a polished portrait, use background replacement and compositing. See our guide on adding a new background to any photo for the full workflow.

Generative Fill Prompts That Work
When you type a prompt into Photoshop's or Firefly's Generative Fill, shorter is almost always better. Here are prompts that work reliably.
Sky replacement: "clean blue sky with light clouds" or "overcast sky." Avoid specifics like "sunset" unless the lighting of the scene matches.
Grass and ground cover: something simple like "green grass" or "natural earth" or "sand." The AI matches perspective and texture to the existing scene surprisingly well.
Walls and architecture: "painted wall" or "brick wall matching the scene." Interior design reference photos respond better to material-only prompts; let the AI handle color based on the surrounding pixels.
Water and reflective surfaces: "ocean surface" or "river water with subtle ripples." Avoid prompts like "rough waves" that conflict with the existing water texture.
The principle: your prompt nudges, it does not command. The surrounding pixels anchor the generation. A prompt that conflicts with the scene will produce either an unusable result or a weird hybrid.
When to Move to Manual Retouching
AI object removal is a speed tool. For any image that matters (a wedding shot, a magazine submission, a print that is going on a wall), manual retouching with the Clone Stamp, Healing Brush, and Patch Tool still produces better results than pure AI. The workflow is slower (often 10 to 30 minutes per image instead of 10 seconds) but invisible to the viewer.
A practical hybrid: use AI object removal to do 90 percent of the cleanup in 10 seconds, then switch to manual tools to fix the 10 percent the AI got wrong. That combination gives you the speed of the AI with the quality of manual retouching. Most working retouchers have converged on that exact workflow since the Remove Tool shipped.
For a deep dive on the manual side, the Photoshop Clone Stamp Tool (S) and Healing Brush (J) have not changed fundamentally since 2012 and are still the default weapons for fine retouching.
Speed vs Quality: Which Tool Wins by Use Case
The question is not "which object remover is best" in the abstract. It is "which one is best for this photo, this deadline, this final use." A rough decision grid based on a year of daily use.
Quick personal photos (vacation, family, social media). iPhone Clean Up if you have it, Canva Magic Eraser if you do not. Both work in 10 seconds and are free. Quality is good enough for Instagram or a family album. Do not overthink this.
Client photography for prints up to 8x10. Lightroom's Remove Tool. Non-destructive, fits the RAW workflow, fast enough to handle a full wedding or portrait session. Quality holds up to a modest print.
Client photography for prints larger than 8x10, or magazine work. Photoshop with Generative Fill, plus a manual retouching pass on anything close to the subject. The hybrid workflow is worth the extra 10 minutes per image when the output matters.
Batch product photography. Photoroom's batch processing. You can upload 50 product shots, set a template, and get clean removed backgrounds plus edited photos in one pass. This is a specialized workflow Photoshop is not optimized for.
Real estate photography. Lightroom or Photoshop with Generative Fill, then careful manual cleanup of any unnatural artifacts. Real estate buyers zoom hard on listing photos, and bad AI fills are obvious.
If you cannot tell whether the removal looks fake, ask someone who has not seen the original. Your brain knows what was there before, so it fills in the edges even when they are broken. A fresh eye sees the flaws you missed. This is worth doing on any image that will be printed or published.
Ethics, Disclosure, and Client Expectations
Object removal sits in a gray area that photographers need to think about before they run the tool, not after.
For commercial and portrait work, removing a stranger walking through a background, a power line through a mountain view, or litter on a beach is generally uncontroversial. The client hired you to make their photos look their best. If a piece of visual noise can be cleanly removed, removing it is part of the job.
For event, wedding, and lifestyle photography, the line is less clear. Removing a guest from a wedding photo because they were not invited (or are no longer welcome) can raise questions down the road. Some photographers build a "light retouching vs heavy retouching" tier into their pricing precisely to set this expectation.
For journalism, documentary, and editorial photography, most publications have explicit policies against AI removal of objects or people. The Associated Press, Reuters, and most major newspapers prohibit it. If you shoot for those markets, keep AI tools for your personal work.
For real estate photography, US laws vary by state on what constitutes a misleading listing image. Removing clutter is accepted. Removing a neighbor's fence, a power pole that actually is there, or significant architectural features can run into disclosure issues. When in doubt, ask the listing agent.
Common Mistakes
Painting too tight. The single most common error. If you paint exactly on the edge of the object, the AI has no buffer to generate clean replacement pixels. Leave 5 to 10 pixels of margin.
Forgetting the shadow. The object is gone but its shadow is still there, telegraphing the removal. Always check the full scene, not just the object's immediate area.
Running the tool multiple times in the same spot. Each pass compounds the artifacts. If the first pass is bad, undo and try again with a fresh selection, rather than running the tool a second time on top.
Trusting the result at phone-screen preview. Always zoom to 100 percent and inspect the edges. If you are delivering for print, also view at print size.
Using AI removal for archival or journalism photos. There are ethical and legal reasons not to alter photos that document real events. Keep AI removal for personal and commercial work where the subject is the client, not the truth.
When removal isn't enough, replace the backdrop entirely


If removing individual objects turns into a fight against every branch, pole, or bystander in the frame, the cleaner fix is to replace the entire background. Cut out your subject, drop them onto a backdrop designed for composites, and you have a polished image in a fraction of the time. Browse the full Illumina Backdrops collection for sports, studio, lifestyle, and zoom packs tuned for exactly this workflow.
What Comes Next
If the background after object removal still looks compromised, the cleanest fix is to replace it entirely. Cut out your subject with a background remover and drop them onto a new backdrop. We design Illumina Backdrops digital backgrounds specifically for this use case: high-resolution packs with matched lighting, tuned for composite workflows. For the step-by-step on the compositing side, see how to add a background to any photo and how to color-match a composite so it reads as real.
Transform Your Photos
Give Your Photos the Wow Factor
Browse our collection of premium digital photo backdrops. 50 high-resolution print-ready backgrounds in each pack. Instant download.
Browse Backdrops

