
When to Schedule Your Maternity Shoot
The sweet spot is 28 to 34 weeks. Your bump is full and round, you still have energy, and most of the third-trimester discomforts (severe swelling, pelvic pressure, difficulty standing for long periods) haven't fully kicked in yet. Around 30 weeks tends to be the goldilocks moment for most people.
That said, there's no single right answer. If you're carrying multiples, you'll show much earlier, and scheduling around 24 to 28 weeks often works better. Some moms want to document the full journey and book two sessions: one early in the second trimester when you're just starting to show, and one later with the full bump.
Give yourself at least two to three weeks of buffer before your due date. Babies arrive early. Photographers get sick. Weather ruins outdoor plans. You don't want to be scrambling at 38 weeks trying to reschedule a session when you can barely tie your shoes.
Pro tip: Book your photographer at the start of your second trimester, even if the shoot won't happen until the third. Popular maternity photographers fill up fast, especially during spring and fall when everyone wants golden hour outdoors.
Indoor vs Outdoor vs Studio
Each setting brings different strengths. Your choice depends on the look you're going for, the season, and your comfort level.
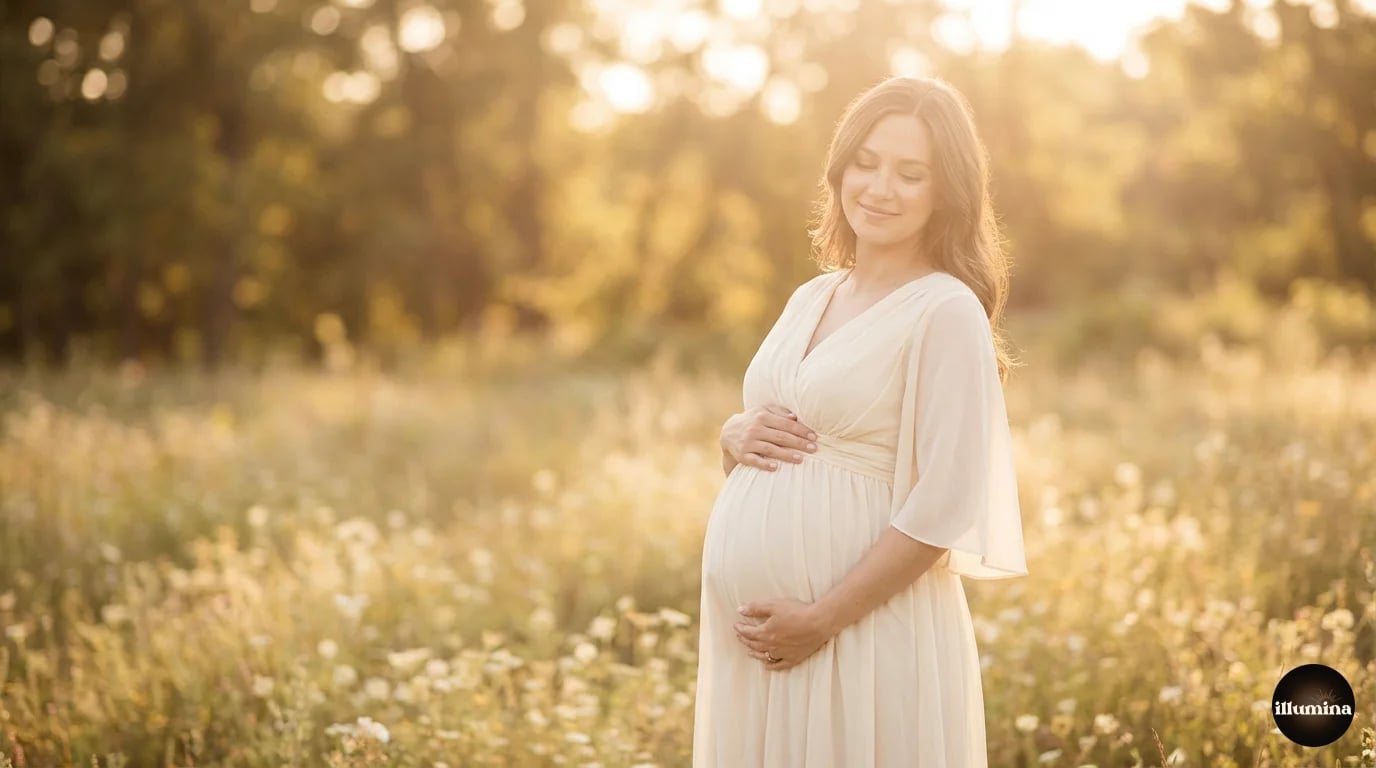
Outdoor maternity sessions
Golden hour in a field, a garden, along a beach, through autumn trees. Outdoor sessions produce that warm, naturally lit, editorial look that fills Pinterest boards. The light does most of the heavy lifting for you.
The downsides are real though. You're at the mercy of weather. Summer sessions in the south can be brutal when you're 32 weeks pregnant and standing in direct humidity for an hour. Wind wrecks styled hair in seconds. And you'll be walking on uneven ground in bare feet or heels while navigating a belly.
Best outdoor seasons: early fall and late spring. You get the golden light without the temperature extremes.
Indoor and at-home sessions
Your bedroom, the nursery, a living room with big windows. Indoor shoots feel intimate and personal. They tell the story of this specific moment in your life, in the actual space where your baby will come home to.
The trick is window light. A large window with sheer curtains creates soft, beautiful, directional light that flatters every body type. Shoot within the first or last two hours of daylight for the warmest tones. Overhead room lights? Turn them off. They cast unflattering color and create competing shadows.
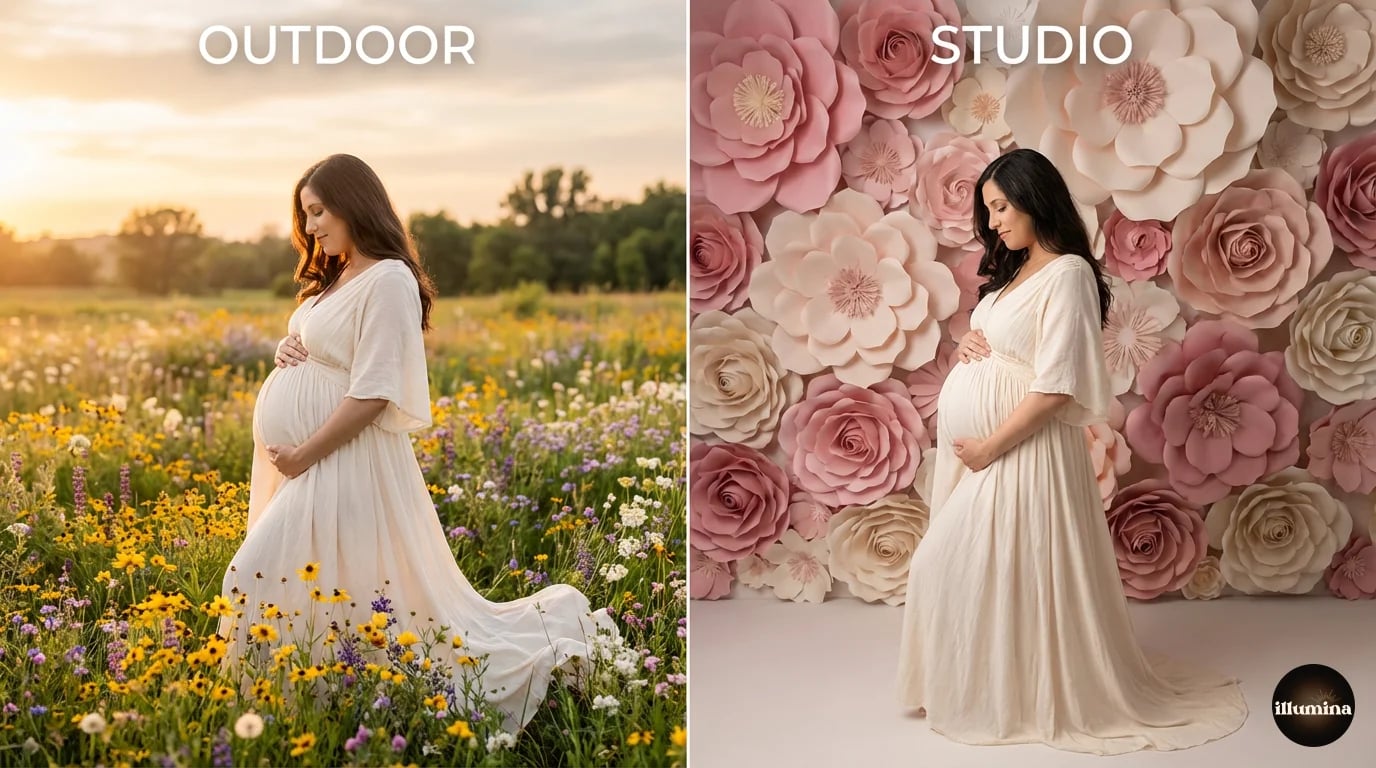
Studio sessions
A studio gives you total control. Consistent lighting, no wind, no bugs, no sudden rainstorms. Climate controlled so you're comfortable. And with digital backdrops, the creative possibilities are essentially unlimited.
This is where maternity photography has changed the most in recent years. Photographers no longer need physical sets with fabric drapes or painted canvases. A single gray background in the studio, combined with high-resolution digital backdrops, means one session can produce images that look like they were shot in a flower garden, an elegant marble room, a misty forest, or a soft white podium setup. All composited in post-production with the subject perfectly lit in a controlled environment.
For photographers, studios mean faster sessions, more variety per client, and dramatically lower overhead. For expecting moms, studios mean air conditioning, a bathroom nearby, and the ability to change outfits without finding a bush to hide behind.
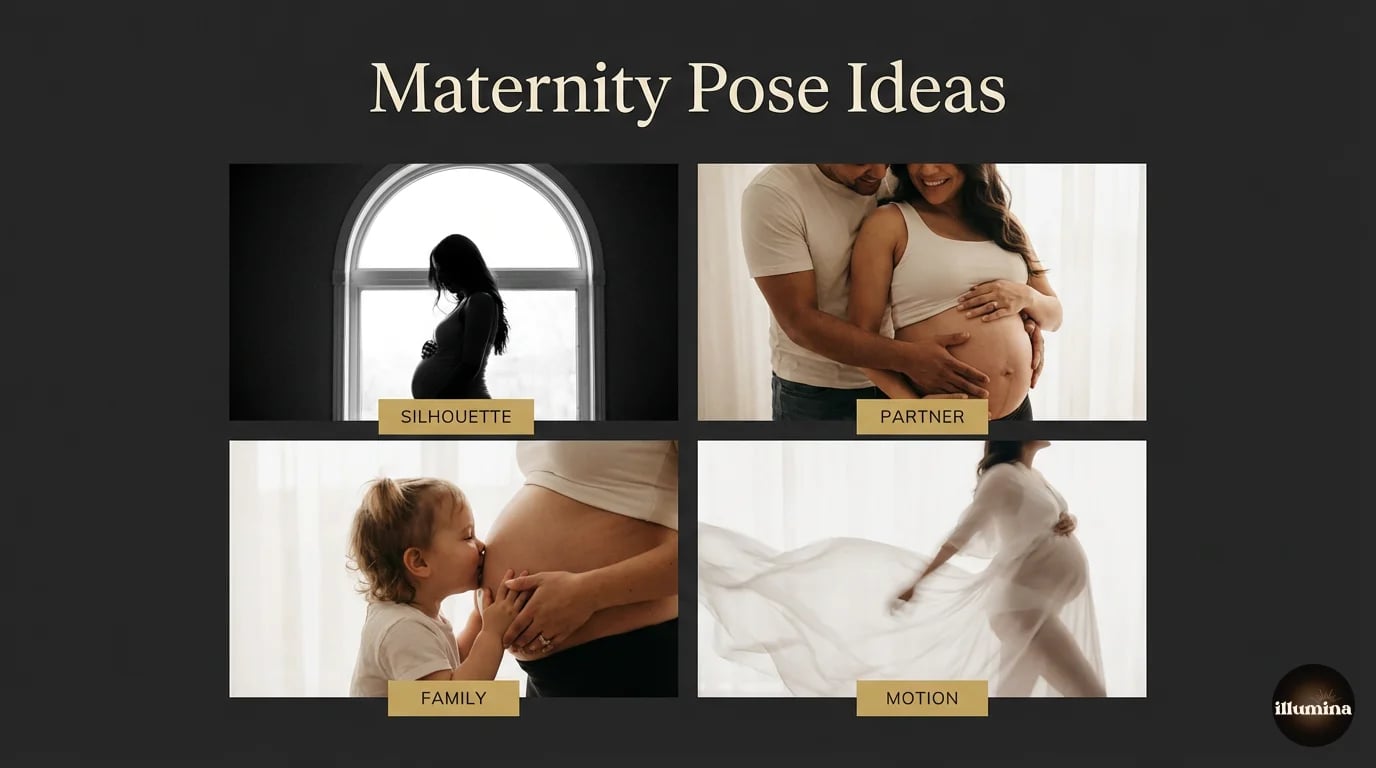
Maternity Pose Ideas
Good posing makes everyone look and feel beautiful. Great posing tells a story. Here's what actually works, organized by style, with specific direction for each.
Classic and elegant poses
The silhouette. Position yourself sideways to the camera with a single light source behind you (a window works perfectly). Arms relaxed at your sides or with one hand gently cradling the bump from below. This creates a striking profile that emphasizes the bump shape. Works in any outfit but looks especially stunning in a fitted dress or with a sheer fabric wrap.
Hands on bump, looking down. Both hands placed on the lower belly, chin tilted slightly down, eyes closed or looking at the bump. This is the quintessential maternity pose and it works because the emotion is genuine. Don't overthink the hand placement. Wherever your hands naturally rest when you're connecting with your baby is the right spot.
Flowing fabric in motion. Wear a long dress or hold a length of sheer fabric and walk slowly toward the camera while the fabric trails behind. The photographer shoots in burst mode. The resulting images have movement and life that static poses can't replicate. A fan or an assistant creating gentle wind helps, but isn't required.
Over the shoulder. Turn three-quarters away from the camera, then look back over your shoulder. One hand on the bump. This is incredibly flattering because it slims the profile while still showcasing the belly. Works beautifully with backless dresses or draped fabric.
Partner poses
Hands together on the bump. Stand facing each other. Partner's hands on the bump, your hands over theirs. Foreheads touching or nearly touching. Eyes closed. This is simple, intimate, and photographs beautifully from multiple angles. The photographer can shoot from the side for a profile view or from slightly above for a more emotional overhead angle.
The wrap from behind. Partner stands behind, arms wrapped around your waist with hands meeting on the bump. You lean back into them slightly. Both looking down at the belly, or one looking at the other. This pose communicates protection and togetherness without being overly posed.
The forehead kiss. Partner kisses your forehead or temple while you both have hands on the bump. It's tender without being overly staged. Helps if the taller partner stands slightly behind so the height difference looks natural rather than awkward.
Walking together. Hold hands and walk slowly toward or past the camera. Genuine smiles, maybe laughing at something. These candid-style shots often end up being the favorites because they feel real. Don't worry about perfect form. The connection matters more than the geometry.
Family and sibling inclusion
Older kids kissing or hugging the bump. Get the child at bump height (kneeling, sitting on a stool, or lifted by a parent). Let them interact naturally with the belly. Some kids will talk to the baby, press their ear against it, or plant a big kiss. Don't force it. Give the child a moment to be themselves and keep shooting.
Family hands on the bump. Everyone's hands stacked or placed on the belly. With toddlers, their tiny hand next to the parents' hands creates a beautiful scale contrast. Keep this quick with young children because their patience is measured in seconds, not minutes.
The announcement lineup. Family standing in a row, each touching the bump, oldest to youngest. Or the family sitting on a bed with the pregnant mom in the center. Casual, relaxed, lifestyle-oriented. This tells the "growing family" story without words.
Pro tip: With kids under 4, schedule the family portion first while everyone's fresh. Get your must-have family shots in the first 10 minutes, then let the partner take the kids for a snack while you do solo and couple poses at a relaxed pace.
Fun and creative ideas
Bump painting. Have someone paint designs on the bare bump: a globe, a baseball, a pumpkin if it's fall, baby's name. Photograph from above with you lying on your back, or from the side as a profile. These are playful and personal, and they make great social media content too.
Themed shoots. Book lover? Surround yourself with children's books. Baker? Flour-dusted apron with a "bun in the oven" sign. Sports family? Jersey and cleats with a tiny matching onesie next to the bump. The best themed shoots reflect who you actually are, not a generic Pinterest board.
Gender reveal integration. If you're finding out the sex during the shoot (or just learned), incorporate colored smoke bombs, confetti, painted toes, or a colored cake. Just make sure your photographer knows the plan in advance so they can frame the shot and prepare for the moment.
What to Wear for Maternity Photos
Wardrobe makes or breaks a maternity session. The right outfit can make you feel incredible. The wrong one creates regret you'll see every time you look at the photos.
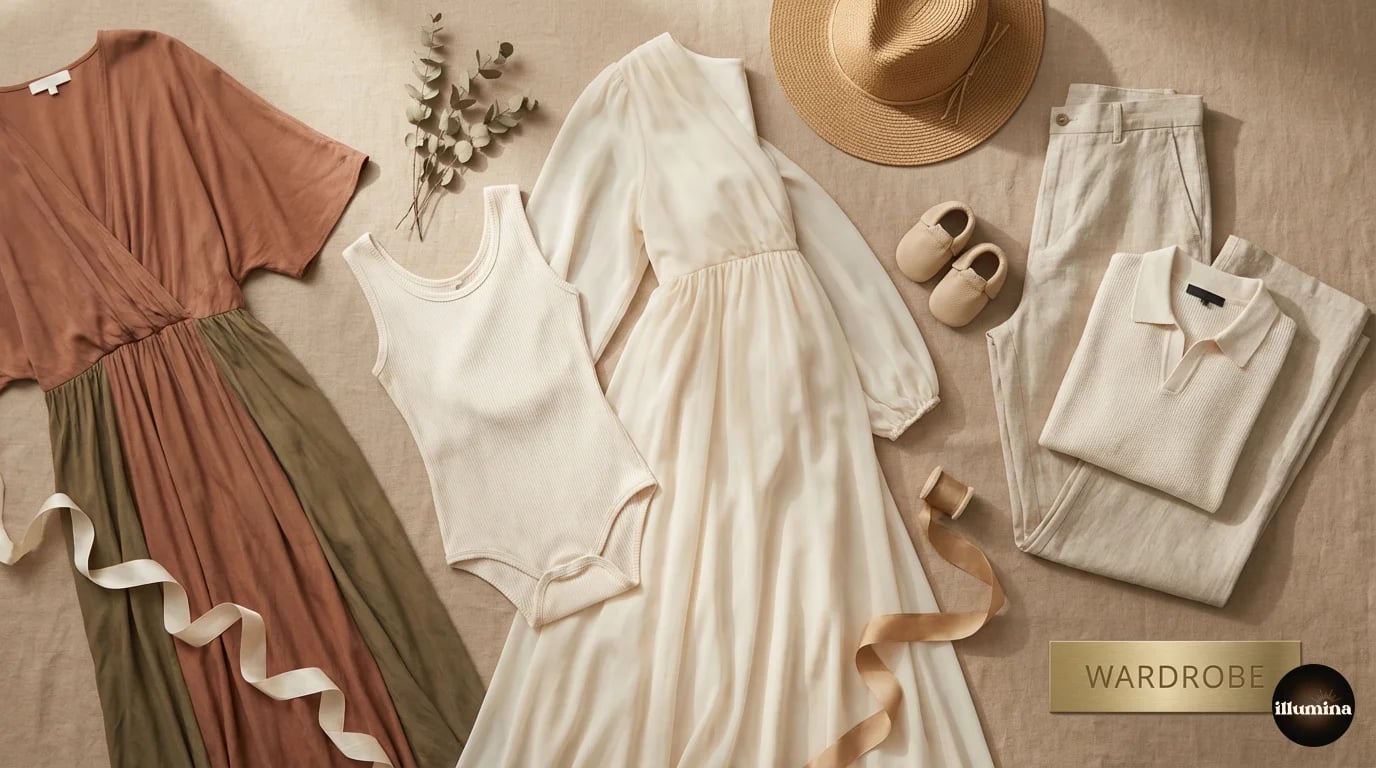
Fitted vs flowing
Fitted dresses and bodysuits show off the bump shape. They're ideal for silhouettes, studio work, and any pose where the belly is the focal point. Look for stretchy fabrics that hug without squeezing. Jersey, ribbed knit, and bodycon materials all work well. Avoid anything with a band or seam that cuts across the belly, as it creates an unflattering line in photos.
Flowing dresses and gowns create drama and movement. Chiffon, tulle, and organza catch light beautifully and create that ethereal, fine-art look. Long trains and extended hems give you fabric to work with during motion shots. Many maternity photographers have a wardrobe collection clients can borrow, so ask before you buy.
Colors that photograph well
Solid colors almost always outperform patterns. Busy prints compete with the bump for visual attention and can look dated quickly.
- White and cream: Clean, timeless, and ethereal. Photographs beautifully in natural light and against both dark and light backdrops. The downside: it shows everything, so fabric quality and fit matter more.
- Earth tones (sage, terracotta, dusty rose, camel): Currently very popular and for good reason. They complement most skin tones and work in virtually every setting.
- Jewel tones (emerald, burgundy, navy, deep plum): Rich and luxurious. These pop against lighter backdrops and studio environments. Especially stunning in velvet fabrics.
- Black: Dramatic, slimming, elegant. Perfect for moody studio work and silhouettes. A black fitted dress against a dark backdrop with a single rim light is a powerful look.
Fabrics that photograph best
Anything that catches and reflects light softly. Chiffon, silk, satin, velvet, and lace all photograph beautifully. Matte jersey is reliable and forgiving. Avoid stiff fabrics that don't drape well (like heavy cotton or denim) and anything with high shine that creates distracting hot spots in photos.
What to skip
Graphic tees and logos. Heavy patterns. Neon colors. Anything with visible brand names. Shoes that will make your swollen feet ache after ten minutes. And unless you're going for a very specific editorial concept, skip the overly themed costumes. A giant bow on your bump reads more "costume" than "keepsake" five years from now.
Coordinating with your partner
Complementary, not matching. If you're in white, put your partner in tan or gray. If you're in emerald, they could wear charcoal or navy. Stay in the same color family without being identical. Both in all white or all black can work for a more editorial look, but test it against your chosen backdrop first to make sure you don't blend in or clash.
Transform Your Photos
Give Your Photos the Wow Factor
Browse our collection of premium digital photo backdrops. 50 high-resolution print-ready backgrounds in each pack. Instant download.
Browse Backdrops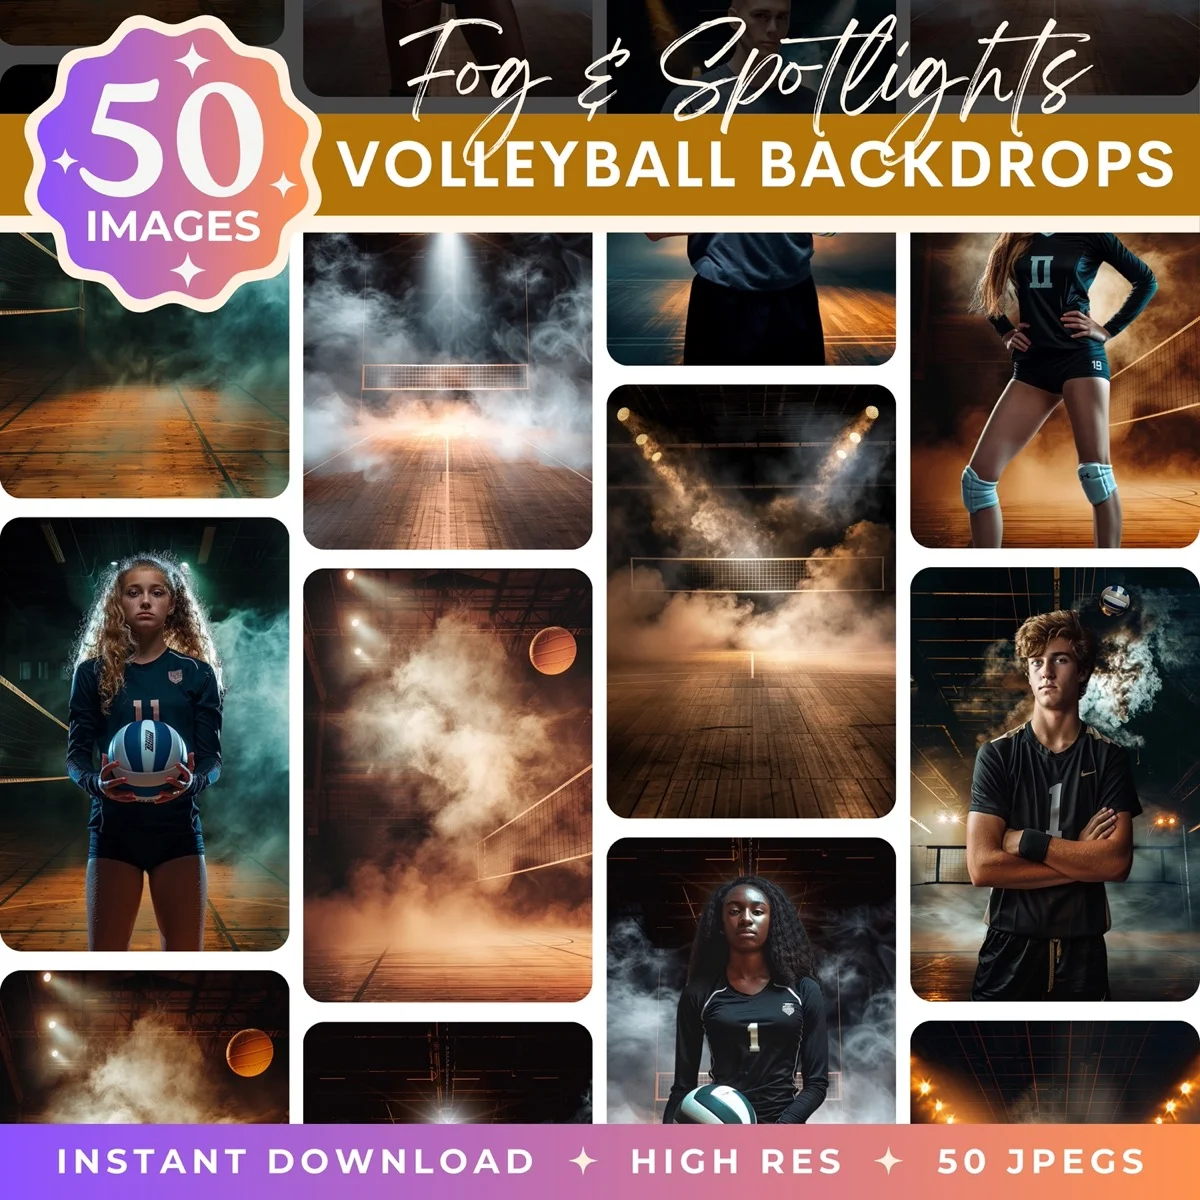
DIY Maternity Photos at Home
Not everyone has the budget for a professional session, and that's completely fine. You can create beautiful maternity photos at home with a phone and some natural light. Seriously.
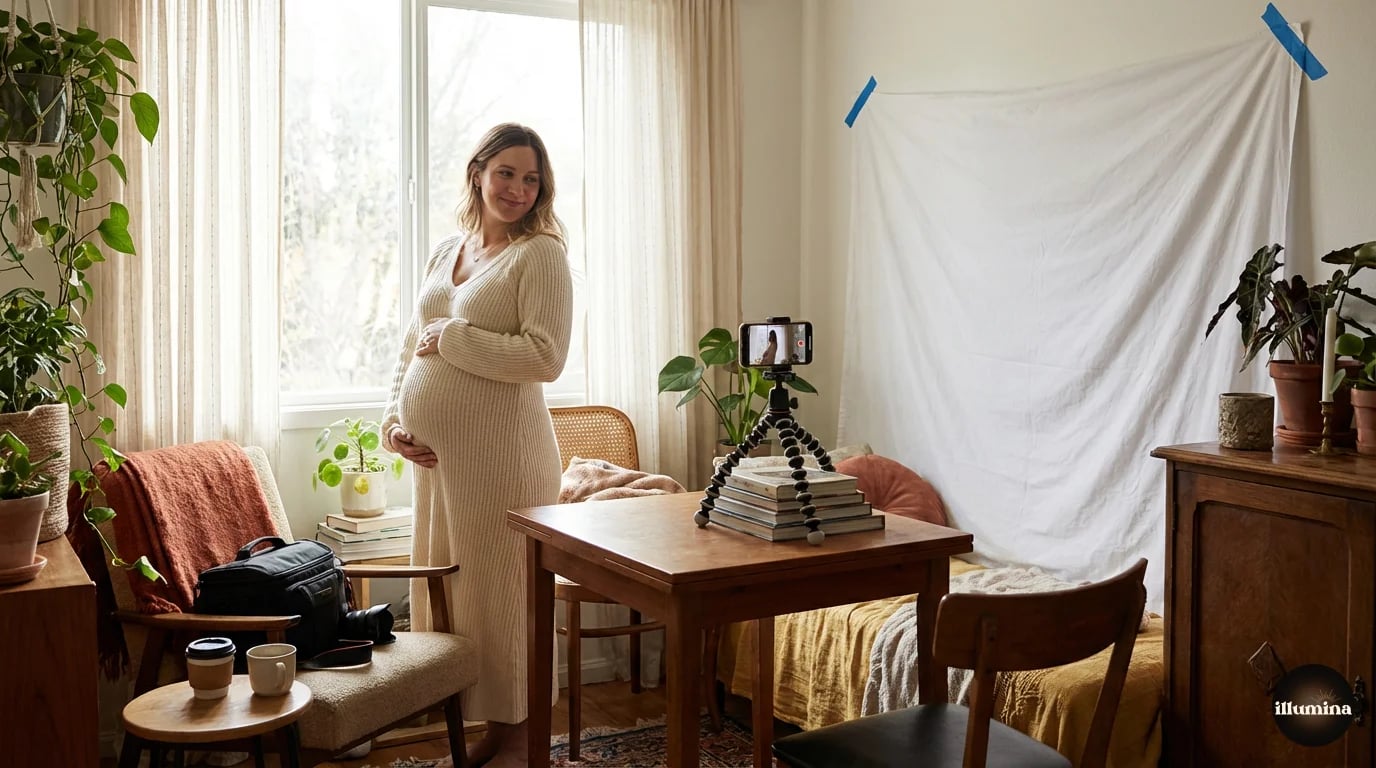
The window light setup
Find the largest window in your home that gets indirect sunlight (not harsh direct beams). Stand about two to three feet from the window, angled so the light falls across one side of your face and body. Turn off all other lights in the room. This single-source setup creates soft, dimensional light with gentle shadows that sculpts the bump beautifully.
Morning light through an east-facing window or late afternoon light through a west-facing window will be warmest. Midday light through a north-facing window will be softer and more neutral. All of these work. Harsh overhead midday sun through a skylight does not.
Phone camera tips
Use portrait mode if your phone has it. This blurs the background and makes you the clear subject. Set a timer (most phones have 3 and 10 second options) and prop your phone on a stack of books, a shelf, or use a cheap tripod ($15 on Amazon).
Shoot at chest height, not from below (unflattering) or from far above (minimizes the bump). If someone's helping, have them stand back and zoom in slightly rather than standing close with a wide angle. Wide-angle lenses distort proportions, especially at the edges of the frame.
Take a lot more photos than you think you need. For every 50 shots, you'll probably love 3 to 5. That's normal and how it works for professionals too.
Simple backgrounds
A clean wall (white, cream, or any solid color) makes a great backdrop. A bedsheet pinned taut to the wall works in a pinch. Your bedroom with made bed and soft pillows creates a lifestyle feel. The nursery, even half-decorated, tells a story.
Clear away visual clutter. Move the laundry basket, hide the phone charger cables, straighten the pillows. You'll notice this stuff in photos even when you were blind to it in person.
Self-timer posing strategy
Set your phone to burst mode with a 10-second timer. Take your position, take a breath, then slowly move through several poses during the burst: hands on bump, one hand up to your hair, looking down, looking at the camera, slight turn. Review and pick the best frame. This method gives you variety without running back and forth to the phone between every single shot.
Studio Maternity Photography with Digital Backdrops
This is the section for photographers, or for expecting moms curious about how those dreamy, impossible-looking maternity images are actually created.
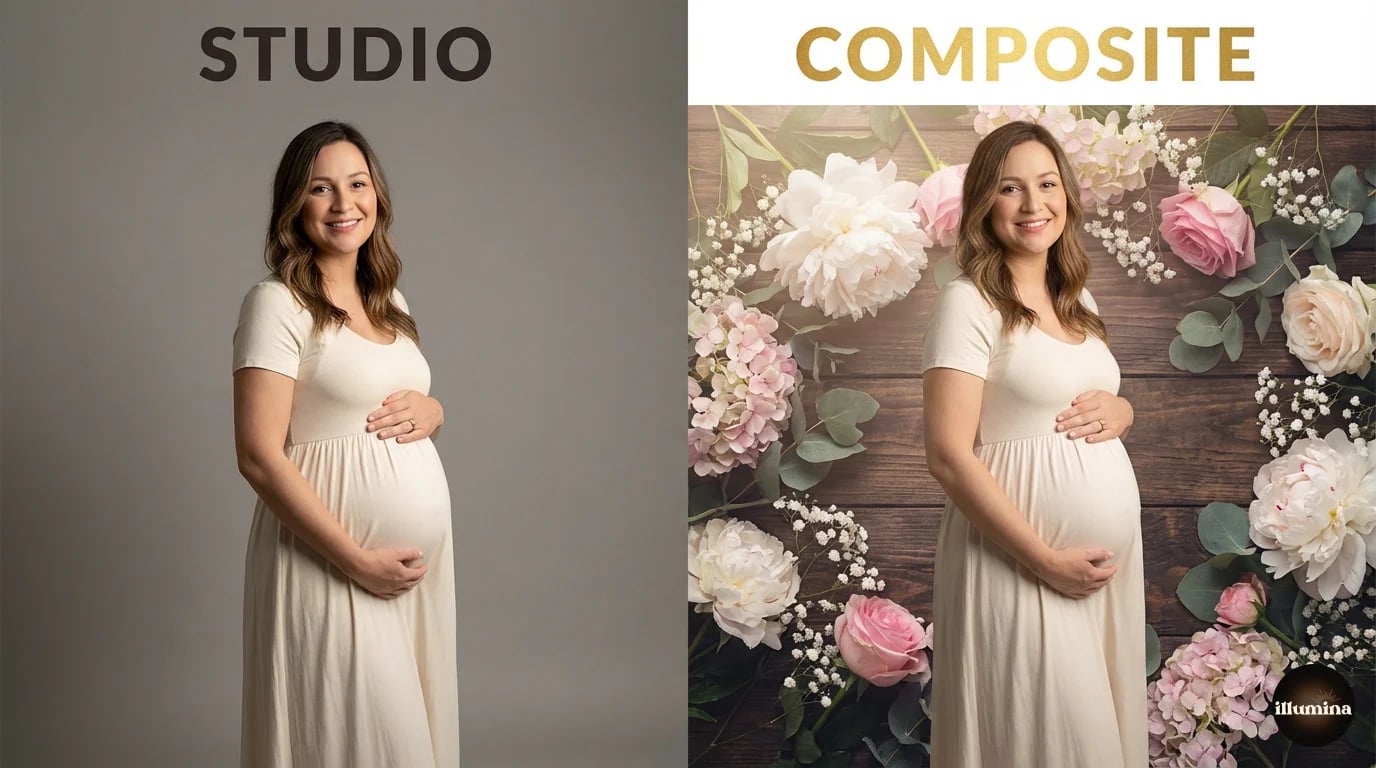
How digital backdrops work
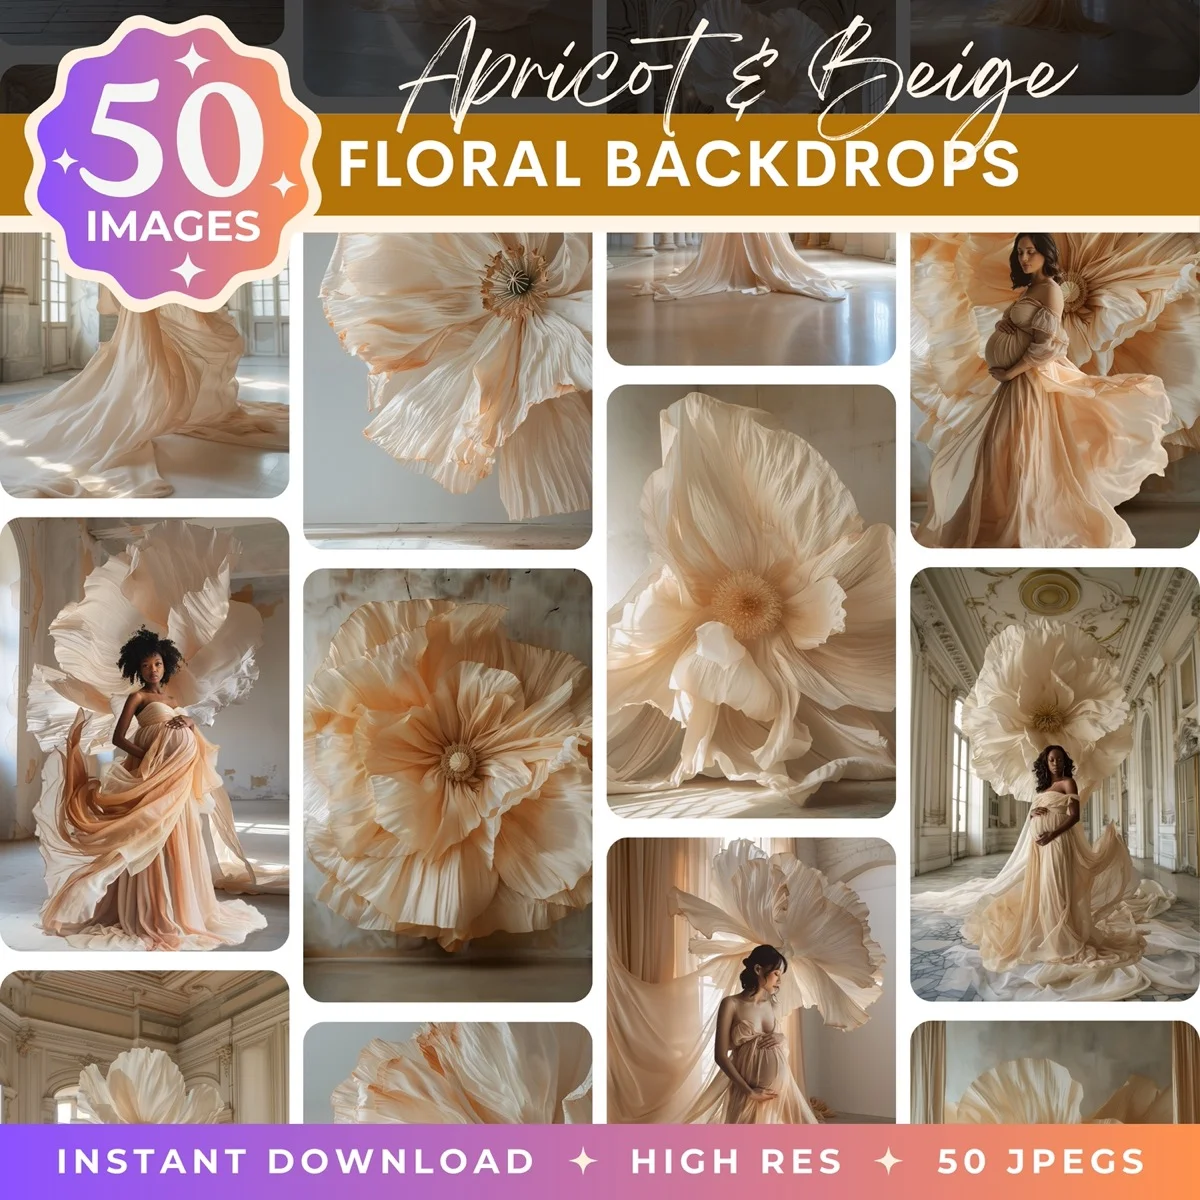
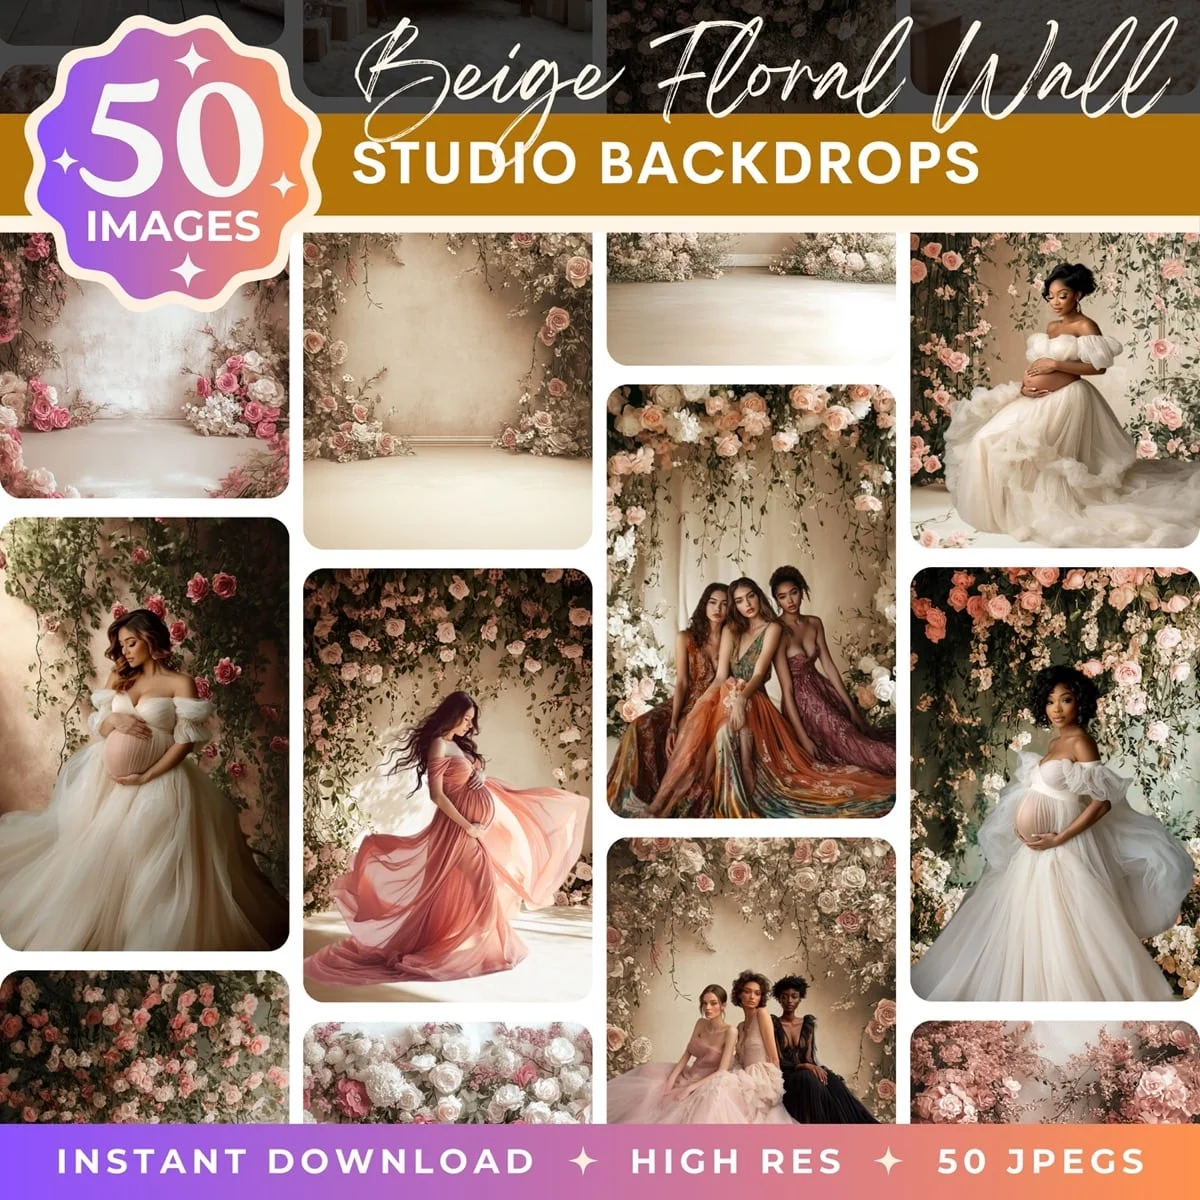
The photographer shoots you in a studio against a plain gray or white background with controlled, professional lighting. In post-production, they remove the studio background and composite your image onto a high-resolution digital backdrop: a flower garden, a soft white room with elegant archways, a sunset field, a misty forest clearing.
The result looks like you were actually standing in that scene. When done well (proper lighting match, color grading, edge refinement), the composite is indistinguishable from an on-location photo. When done poorly, it looks like a bad green screen. The difference comes down to the quality of the backdrop images, the photographer's lighting setup, and their editing skill.
Why photographers are switching to digital
Physical backdrops are expensive, bulky, limited, and they wear out. A painted canvas for a maternity studio might cost $300 to $800 and gives you exactly one look. A single digital backdrop pack gives you 50 different scenes for a fraction of that cost, stored as files on a hard drive instead of rolled up in a corner of the studio.
Digital backdrops also mean variety for clients. Instead of offering two or three backdrop options per session, a photographer with a good digital collection can offer dozens of looks. Soft florals for one client, dramatic moody tones for another, elegant minimalist white for the next. All shot in the same studio space.
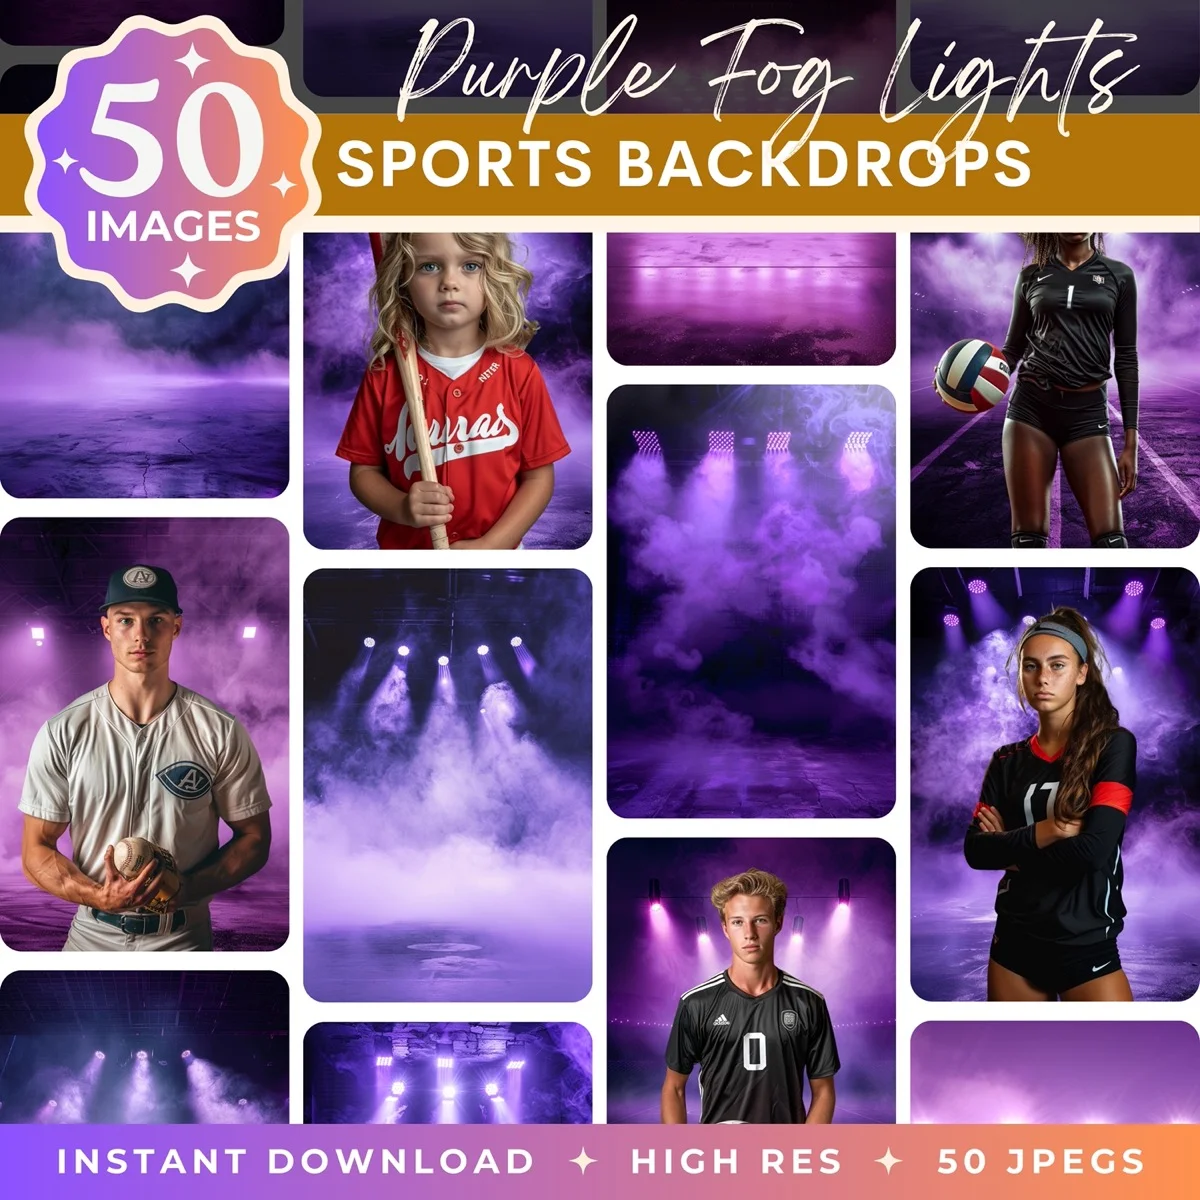
Packs designed specifically for maternity work (like the maternity collections from Illumina Backdrops) include scenes with soft, diffused lighting that matches common studio setups, making the compositing process much faster and more convincing.
What makes a good maternity backdrop
Not all digital backdrops work for maternity. You need scenes with soft, flattering light. Harsh shadows and high contrast work for sports photography but fight against the gentle, ethereal aesthetic most maternity clients want.
Look for: soft ambient lighting, muted or pastel color palettes, depth and dimension (not flat walls), enough open space for the subject to breathe within the frame. Floral elements, gentle fog, architectural details like archways or pillars, and natural textures all work beautifully.
Resolution matters too. For print-quality composites, your backdrop needs to be at least 6000 pixels on the shortest side. Anything smaller will look soft or pixelated when printed at standard portrait sizes.
Lighting to match digital backdrops
The biggest mistake in composite maternity photography is mismatched lighting. If your backdrop has soft, even, front-facing light and you've lit your subject with dramatic side lighting, the composite will never look believable.
A reliable starting setup: one large softbox (36 inches or bigger) at 45 degrees camera-right, slightly above head height. A fill card or second softbox on the opposite side at lower power. This creates gentle directional light with open shadows that matches the majority of digital backdrop scenes. Add a hair light or rim light from behind if your backdrops have any backlit elements.
Maternity Photo Editing Tips
Whether you're editing your own DIY photos or you're a photographer polishing client work, a few editing techniques make maternity images feel complete.
Skin retouching (keep it tasteful)
Pregnancy brings stretch marks, temporary skin changes, visible veins, and linea nigra. Some clients want these left completely natural. Others want subtle softening. Always ask. Never assume.
If retouching, use frequency separation or a light skin-smoothing action at low opacity. The goal is evening out temporary blemishes while keeping skin texture visible. Over-smoothed skin looks plastic and dated. A 20% opacity pass is almost always enough.
Color grading for warmth
Maternity images almost always benefit from warm tones. In Lightroom or Photoshop Camera Raw, push the temperature slider slightly warm (around +5 to +10), lift the shadows a touch, and add a gentle fade to the blacks. This creates that soft, glowing quality that defines modern maternity photography.
For a film-inspired look, add a subtle orange-teal split tone: warm highlights, slightly cooled shadows. Go easy. A little goes a long way, and heavy-handed color grading dates photos faster than almost anything else.
Black and white conversions
Some maternity images are stronger in black and white. Silhouettes, close-up bump details, intimate partner moments. Converting to black and white removes the distraction of color and puts all the emphasis on form, light, and emotion.
Don't just desaturate. Use a proper black and white conversion with channel mixing. Boost the red and orange channels slightly (this brightens skin tones) and darken the blue channel for moodier skies and backgrounds. The difference between a desaturated image and a properly converted black and white is enormous.
Compositing techniques for digital backdrops
If you're working with digital backdrops, the editing workflow goes: extract subject (Select Subject in Photoshop, then refine the mask), place onto backdrop, match color temperature and exposure, add a subtle shadow, apply a unified color grade over the entire image. The final color grade is the step that ties everything together. Without it, even well-matched composites feel like two separate images.
For a deeper walkthrough, the composite photography guide covers the full process step by step.
Props and Accessories
Props can add personality and meaning to maternity photos. They can also look cheap and distracting if you're not selective.

What works
- Flower crowns (fresh flowers photograph better than silk, but good quality silk is fine for photos taken from a few feet away)
- Sheer fabric wraps and veils for ethereal movement shots
- Baby shoes, especially tiny sneakers or meaningful heirloom booties
- Ultrasound images held near the bump or placed in the nursery scene
- Children's books, especially if reading is meaningful to your family
- Meaningful jewelry: a locket, grandmother's bracelet, something with a story
What looks dated
- Wooden block letters spelling "BABY" or the child's name (peaked around 2018)
- Large chalkboard countdown signs
- Oversized ribbon bows tied around the bump
- "Coming Soon" movie-poster-style signs
- Excessive tulle in unnatural colors
The best props are personal. They connect to your actual life, not to a trend you saw online three years ago. If you play guitar, bring the guitar. If you met your partner at a coffee shop, hold matching mugs. The photos that mean the most in ten years are the ones that tell your specific story.
Pro tip: Less is more with props. Pick one or two meaningful items and use them in a handful of shots. Then set everything aside and focus on you, your bump, and your people. The simplest images almost always end up being the ones you frame.
Pulling It All Together
A maternity photoshoot doesn't need to be complicated. Pick a time in that 28 to 34 week window. Choose one or two outfits in solid colors that make you feel beautiful. Find good light, whether that's a west-facing window in your bedroom, a field at golden hour, or a photographer's studio with digital backdrops that can place you anywhere.
Relax your shoulders. Put your hands where they naturally fall. Let your partner hold you the way they always do. If you have other kids, let them be their chaotic, wonderful selves for ten minutes before the snacks come out.
The technical stuff matters, yes. Lighting, posing, wardrobe, backdrop selection, editing. But the photos you'll love most are the ones where you forgot about all of that for a second and just felt it. The anticipation. The connection. The bigness of the moment.
Everything else is just making sure the camera was ready when it happened.
Transform Your Photos
Give Your Photos the Wow Factor
Browse our collection of premium digital photo backdrops. 50 high-resolution print-ready backgrounds in each pack. Instant download.
Browse Backdrops

