In this guide
- Quick Setup: Virtual Background in 30 Seconds
- How to Set Virtual Backgrounds in Zoom
- Microsoft Teams Backgrounds
- Google Meet Backgrounds
- What Makes a Good Virtual Background
- Best Types of Professional Backgrounds
- How to Look Good on Camera with Virtual Backgrounds
- Premium vs Free Backgrounds
- Troubleshooting Common Problems
Quick Setup: Virtual Background in 30 Seconds
Already in Zoom and just need to change your background right now? Here's the fastest path:
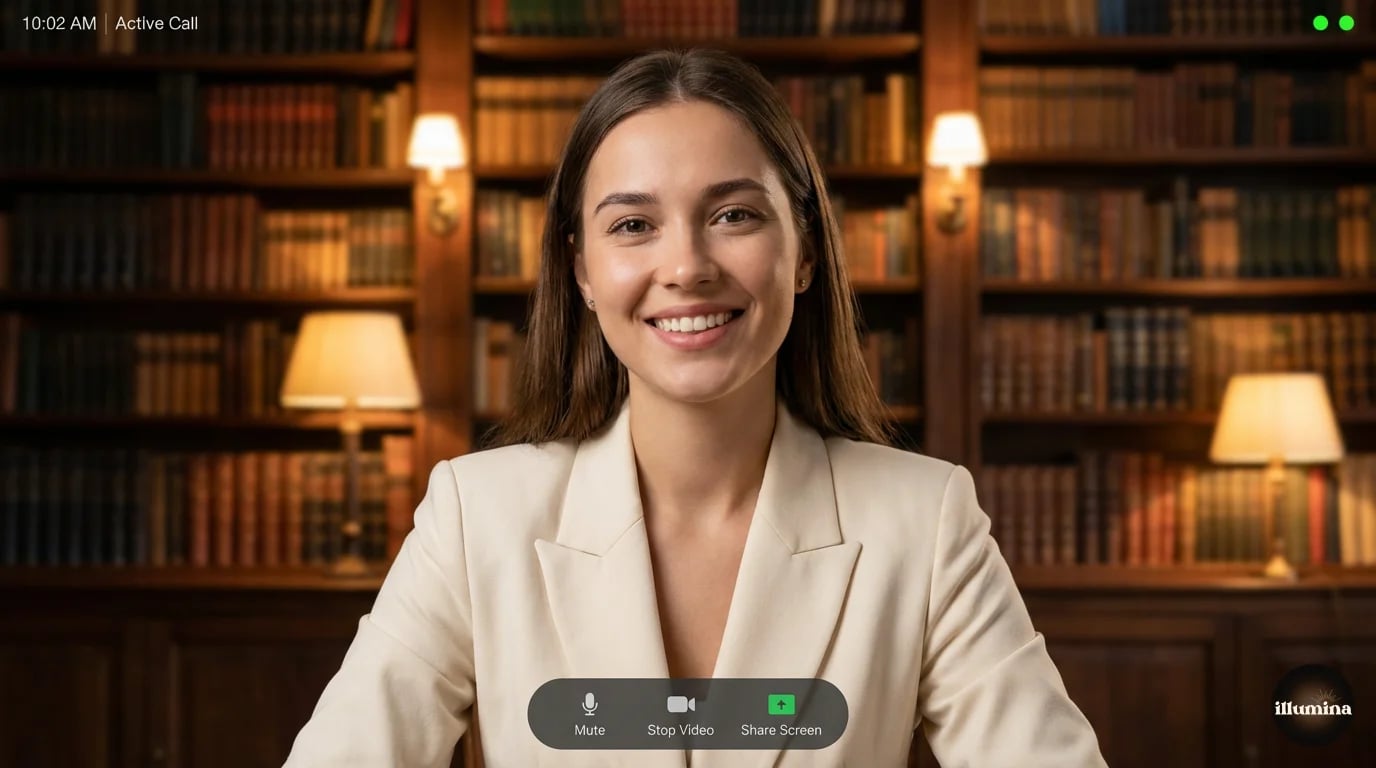
Click the upward arrow next to the video icon in your meeting toolbar. Select "Choose Virtual Background." Pick one of the built-in options or click the "+" icon to upload your own image. Done. Your background changes instantly.
If you're not in a meeting yet, open Zoom, click the gear icon (Settings), go to "Background & Effects," and choose or upload your background there. It'll apply automatically to your next call.
That's the 30-second version. But if you want your virtual background to actually look good (and not make you look like a floating head glitching in and out of a beach photo), keep reading.
How to Set Virtual Backgrounds in Zoom
Zoom offers two modes for virtual backgrounds, and choosing the right one makes a real difference in quality.
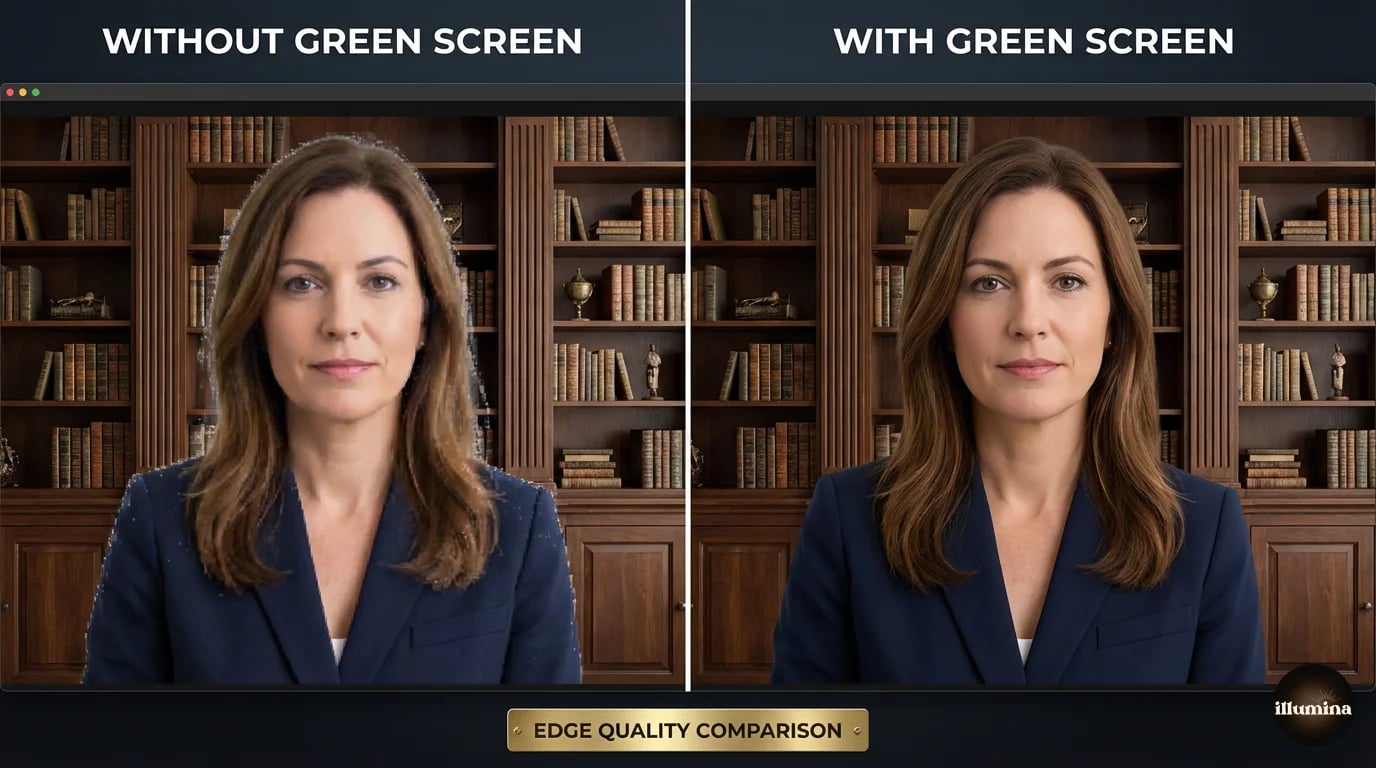
Without a green screen (most people)
This is the default. Zoom uses AI to detect your outline and separate you from whatever's behind you. It works reasonably well in good lighting but struggles with fine details like hair edges, especially curly or flyaway hair.
To get the best results without a green screen:
- Sit at least two feet from any wall or physical background behind you
- Make sure the space behind you is relatively uncluttered
- Use good, even lighting on your face (more on this below)
- Avoid wearing clothing that matches your background color
With a green screen
If you check the "I have a green screen" box in Background & Effects, Zoom switches to chroma key mode. This produces dramatically cleaner edges because the software has a solid reference color to remove instead of guessing.
You don't need a professional green screen. A $15 green fabric from Amazon hung behind you works fine. The key is even lighting on the screen itself, with no wrinkles or shadows creating dark spots. Uneven green screens cause patchy removal that looks worse than using no green screen at all.
Video settings that help
A few tweaks in Zoom's video settings improve virtual background quality:
- HD video: Turn this on (Settings > Video > Camera > HD). Higher resolution gives the AI more pixel data to work with.
- Touch up my appearance: The subtle setting smooths your image slightly, which can reduce edge flickering.
- Adjust for low light: Set to "Auto" if your room lighting is inconsistent. This helps prevent the background from bleeding through in dim areas.
Uploading custom backgrounds
Click the "+" icon in Background & Effects, then "Add Image." Zoom accepts JPEG, GIF (not animated), and PNG files. For best results, use images at 1920x1080 pixels or higher. Anything below 1280x720 will look noticeably blurry, especially on larger monitors.
Zoom stores your uploaded backgrounds locally, so they persist between meetings. You can add as many as you want and switch between them mid-call.
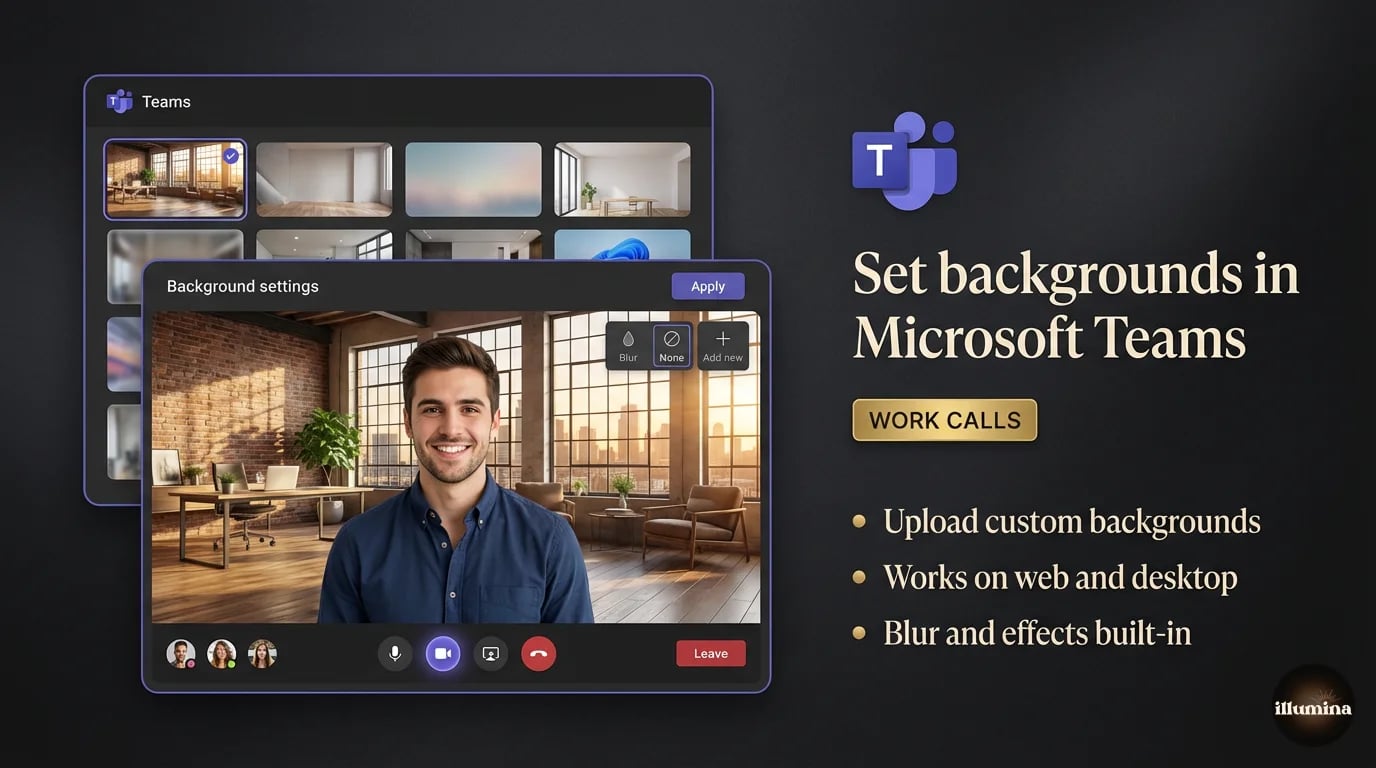
Microsoft Teams Backgrounds
Teams handles virtual backgrounds a bit differently than Zoom, and honestly, the built-in detection is slightly better in most conditions.
Before joining a meeting
When you're on the pre-join screen (where you see your camera preview), click the background effects icon. It's between the microphone and camera toggles. You'll see Microsoft's built-in backgrounds plus any custom ones you've uploaded.
During a meeting
Click the three dots ("More") in the meeting toolbar, then "Video effects." Same panel appears. You can swap backgrounds mid-call without interrupting anything.
Uploading custom Teams backgrounds
Click "Add new" at the top of the background effects panel and browse for your image. Teams accepts JPEG, PNG, and BMP files. The recommended resolution is 1920x1080, and the aspect ratio should be 16:9. Images that don't match this ratio get cropped automatically, which can cut off important parts of your background.
One quirk: Teams stores custom backgrounds in a specific folder on your computer. On Windows, it's %AppData%\Microsoft\Teams\Backgrounds\Uploads. On Mac, it's ~/Library/Application Support/Microsoft/Teams/Backgrounds/Uploads. You can drop images directly into this folder to bulk-add backgrounds without uploading them one by one through the interface.
Teams vs Zoom background quality
In testing, Teams tends to handle hair edges slightly better than Zoom in the default (no green screen) mode. Zoom's green screen mode still wins overall. Both platforms struggle with the same things: fast hand movements, objects held near your face, and thin items like pen tips or glasses frames.
Google Meet Backgrounds
Meet keeps things simple. Before joining a call, click the three dots on your preview screen and select "Apply visual effects." During a call, click the three dots in the bottom toolbar, then "Apply visual effects."
You get three options: slight blur, full blur, or a background image. Meet's built-in image library is smaller than Teams' but covers the basics. To upload your own, click the "+" icon and select an image file.
Meet's edge detection falls behind both Zoom and Teams. It's adequate for casual calls but tends to produce more shimmer and ghosting around your outline, particularly if you move quickly. Good lighting helps a lot here.
One advantage Meet has: it runs entirely in the browser, so background effects work on Chromebooks and any device with Chrome. No app installation required.
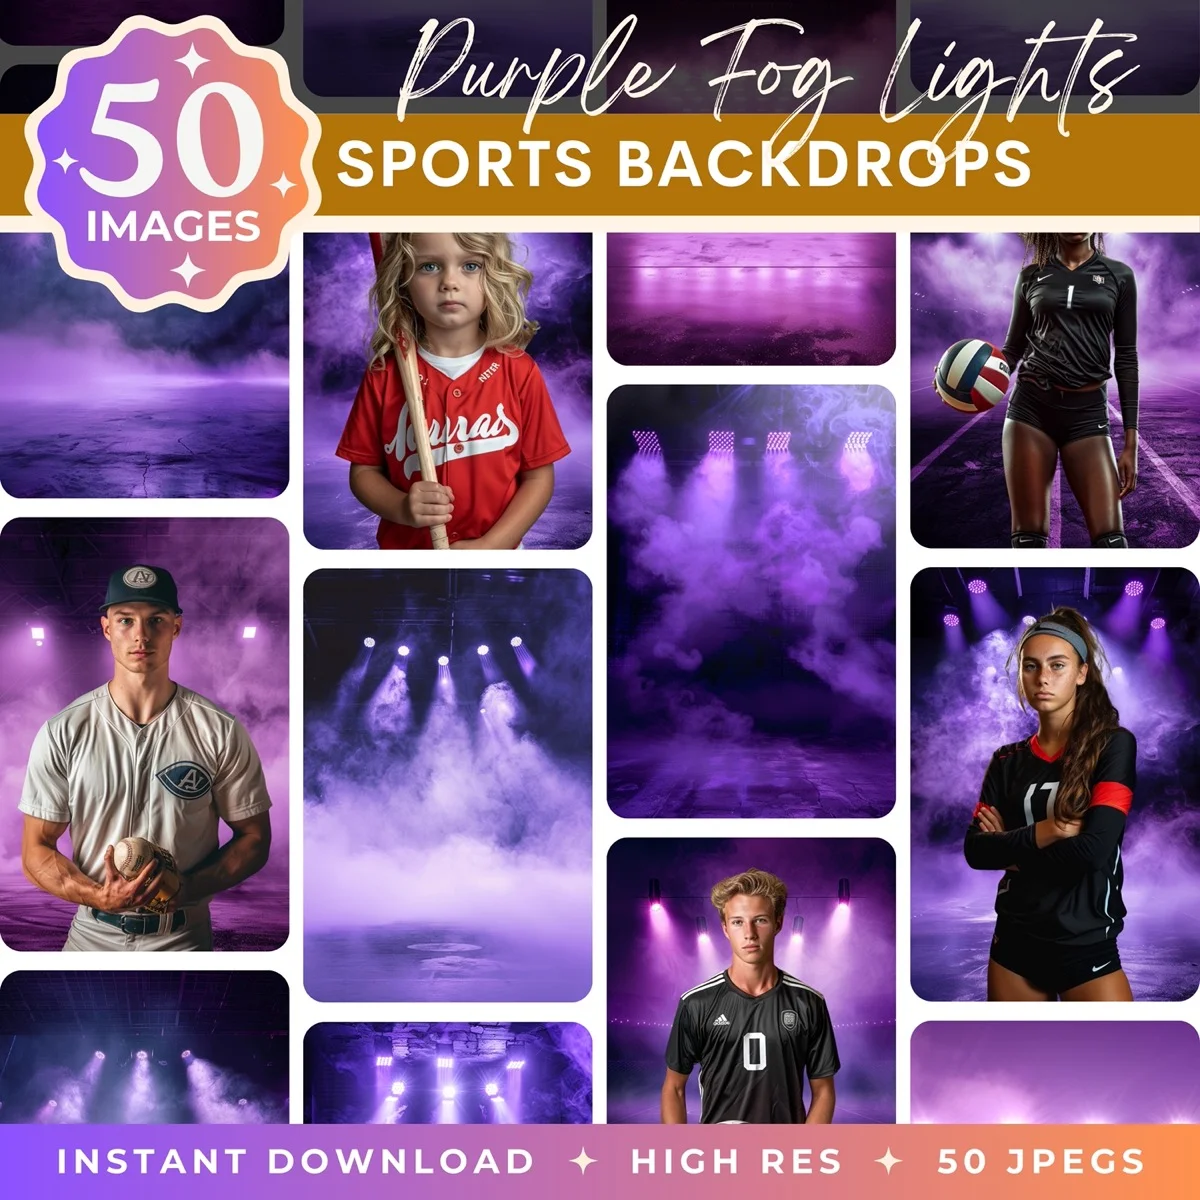
Transform Your Photos
Give Your Photos the Wow Factor
Browse our collection of premium digital photo backdrops. 50 high-resolution print-ready backgrounds in each pack. Instant download.
Browse Backdrops

What Makes a Good Virtual Background
Not all backgrounds work well as virtual backgrounds. A stunning 4K landscape photo might look incredible as a desktop wallpaper but terrible behind you on a video call. Here's what actually matters.
Resolution
Minimum 1920x1080 pixels. Anything lower and the background looks soft and pixelated, especially on larger screens or when a colleague views your video in full-screen mode. That pixelation is immediately noticeable and makes the whole setup look cheap. Higher resolution (2560x1440 or even 3840x2160) is better since Zoom and Teams will downsample cleanly, but they can't add sharpness to a low-res source.
Lighting direction
This is the detail most people overlook. If your background image has strong directional lighting coming from the left, but your actual face is lit from the right, your brain registers the mismatch even if you can't articulate why. It just looks off. Choose backgrounds with soft, even lighting or with a light source that roughly matches where your actual light comes from.
Busyness and distraction
Your background should support the conversation, not compete with it. Backgrounds crammed with detail, bright colors, or visual complexity pull attention away from your face. The best virtual backgrounds have some visual interest (a bookshelf, a window, some plants) but are calm enough that your colleagues focus on you.
A general rule: if someone on the call would spend time studying your background instead of listening to what you're saying, it's too busy.
Context appropriateness
A tropical beach background in a board meeting sends a different message than a clean office setup. Match your background to the situation. Professional contexts call for professional backgrounds. Creative calls give you more room to express personality. Client-facing meetings should always lean conservative.
Best Types of Professional Backgrounds
Certain background styles work better for video calls than others. Here's what actually performs well, based on what different professionals need.
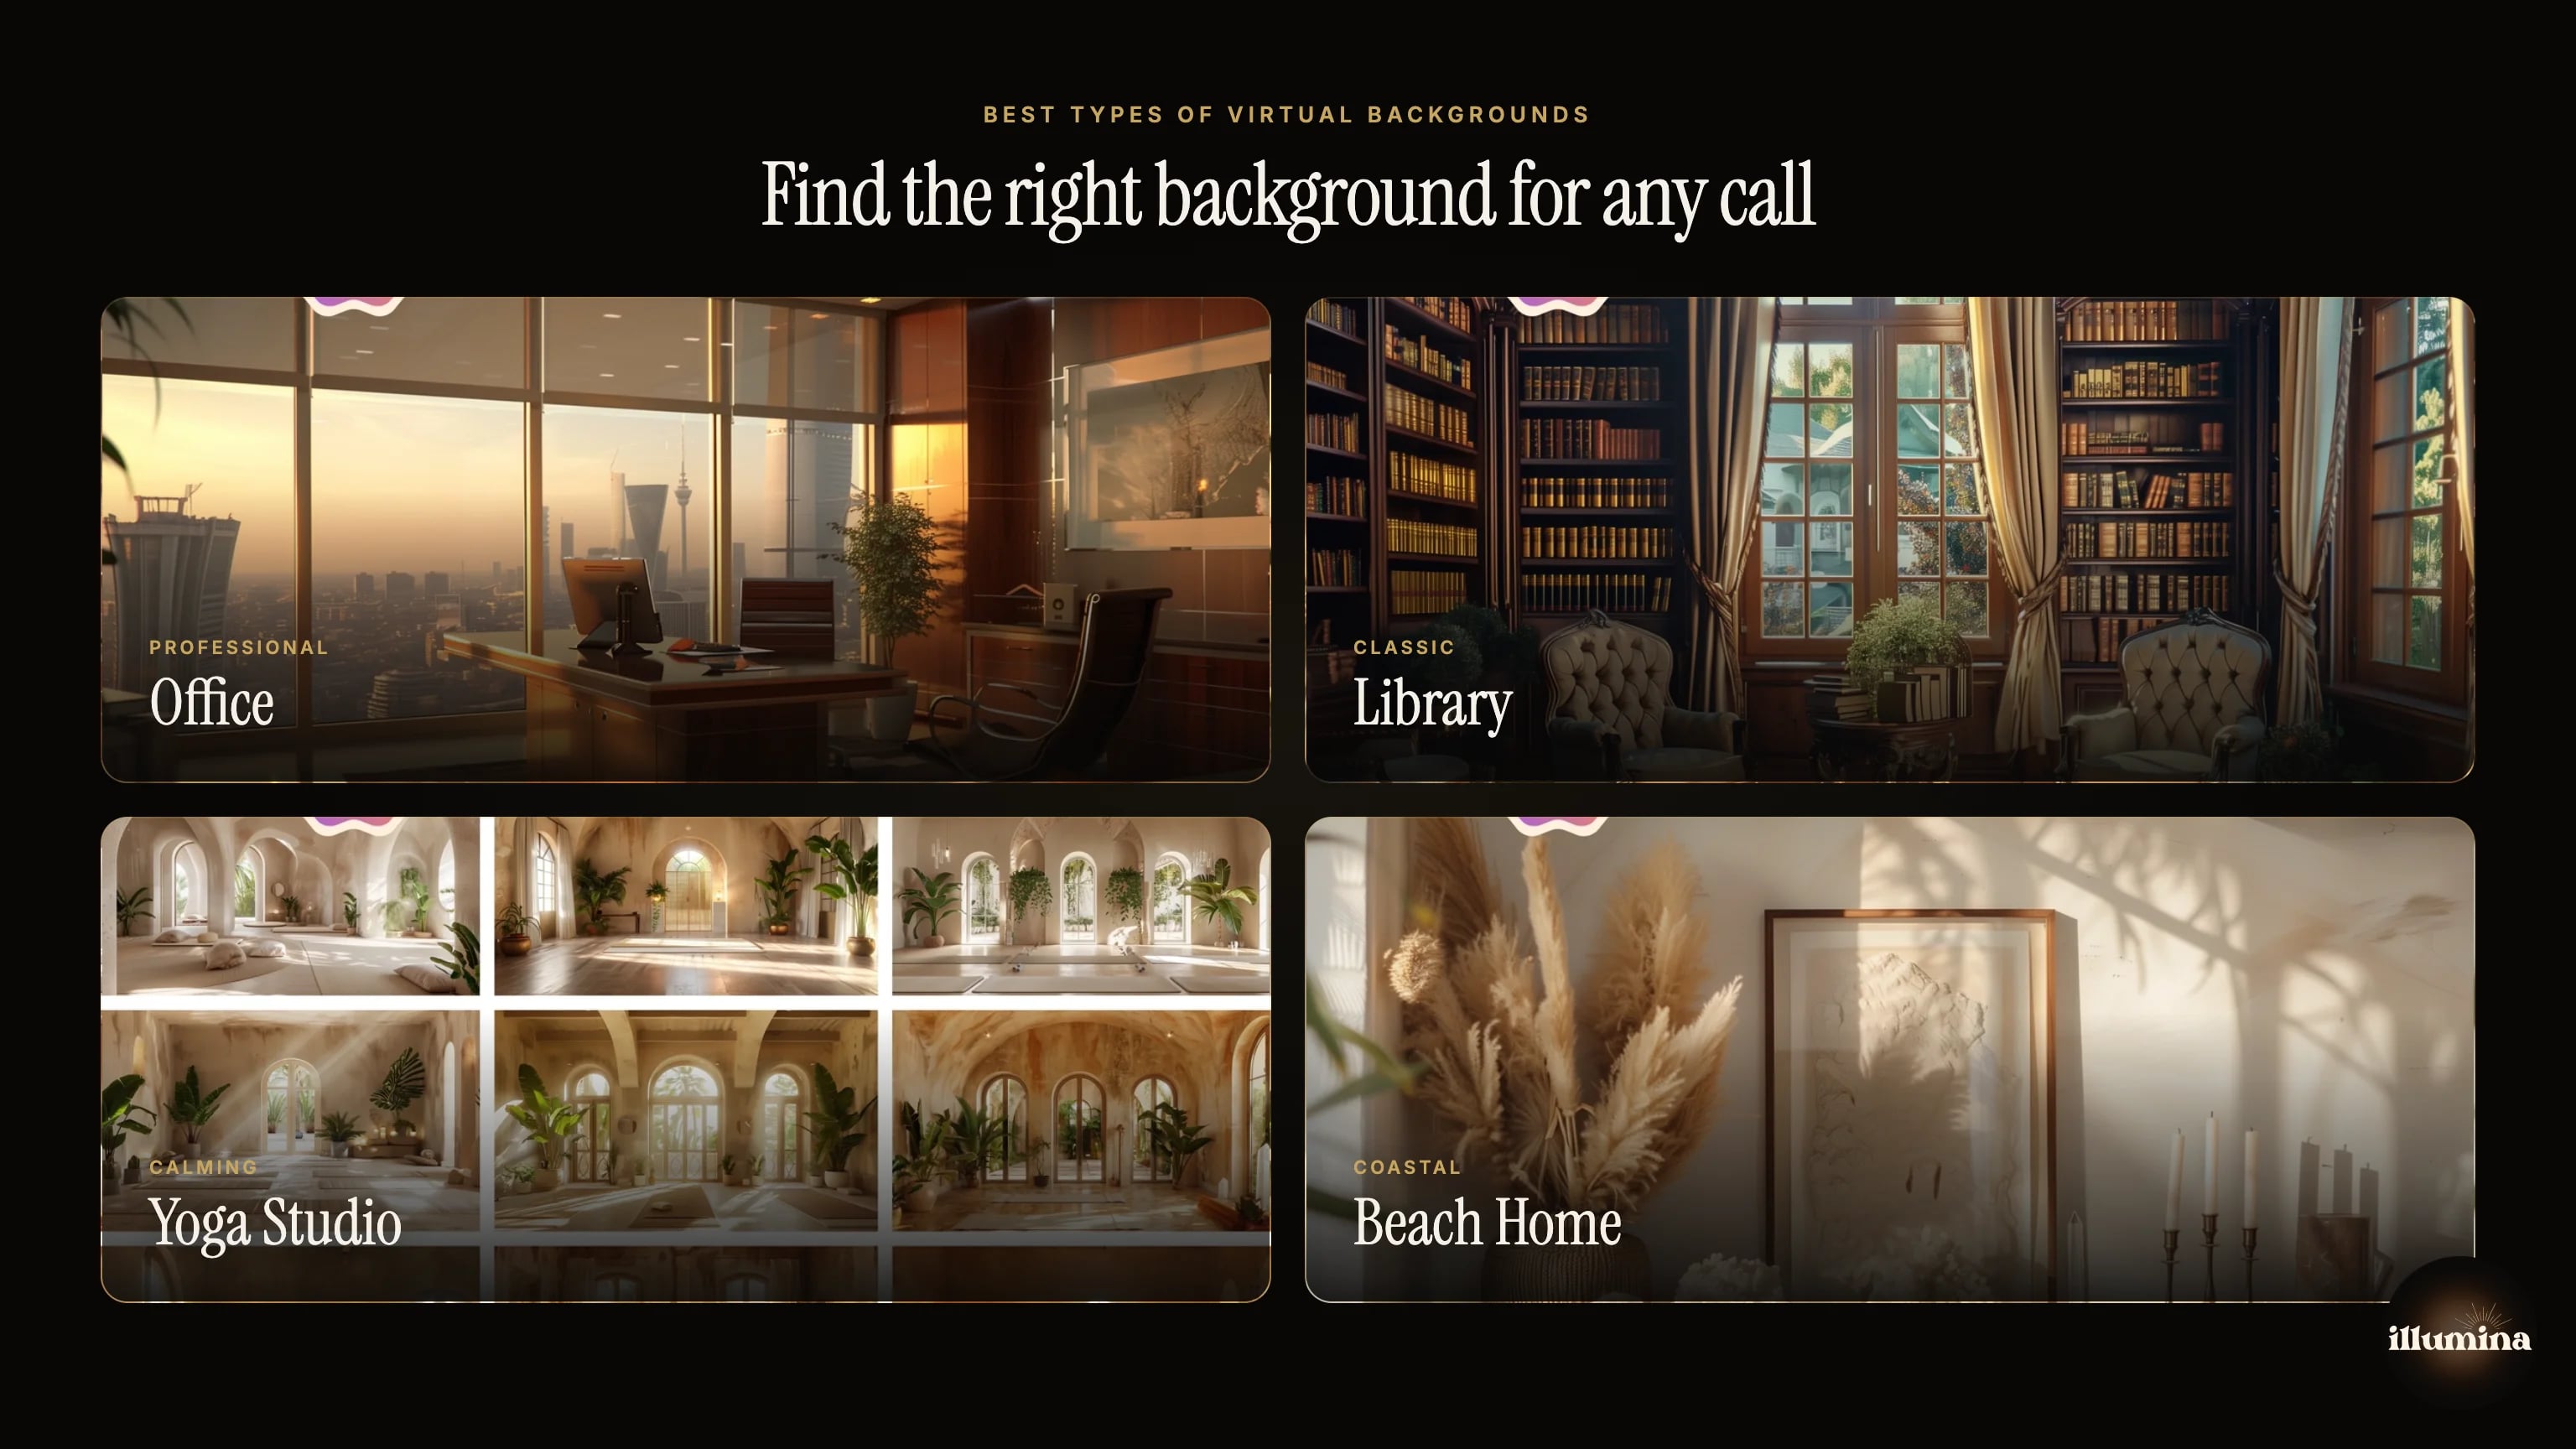
Home office and bookshelf
The most universally appropriate choice. A clean bookshelf, tasteful desk setup, or modern home office reads as professional without being sterile. These backgrounds work for everyone from software engineers to sales reps to executives. They say "I have my life together" without trying too hard.
Minimalist and neutral
Soft neutral tones, subtle textures, maybe a plant or two. These backgrounds are practically invisible in the best way. They don't distract, don't clash with any dress code, and work in every meeting context. If you're unsure, go minimalist. You can't go wrong.
Nature and outdoor scenes
Beach views, mountain landscapes, garden settings. These work well for less formal calls and for professions where approachability matters more than corporate polish. Therapists, coaches, yoga instructors, and creative professionals often prefer these. Just make sure the image isn't so dramatic that it becomes a talking point every call.
Matching backgrounds to your profession
Think about what your background communicates:
- Therapists and counselors: Warm, calm, grounding. Soft colors, natural elements, no clutter. Your clients need to feel safe, and a chaotic background undermines that.
- Sales and client-facing roles: Clean, professional, subtly impressive. A well-appointed office or modern workspace. Nothing flashy, nothing distracting.
- Creative professionals: You have the most freedom here. An art studio, a design workspace, or something bold and colorful can reinforce your creative identity.
- Executives and leadership: Classic and refined. Think corner office, elegant bookshelf, or high-end modern minimalism. The background should project authority without being ostentatious.
- Teachers and educators: Bright, inviting, maybe slightly playful. A background that feels like a comfortable learning space keeps students engaged.
How to Look Good on Camera with Virtual Backgrounds
Your background is only half the equation. If your face looks washed out, grainy, or weirdly shadowed, even the nicest virtual background won't save the impression.
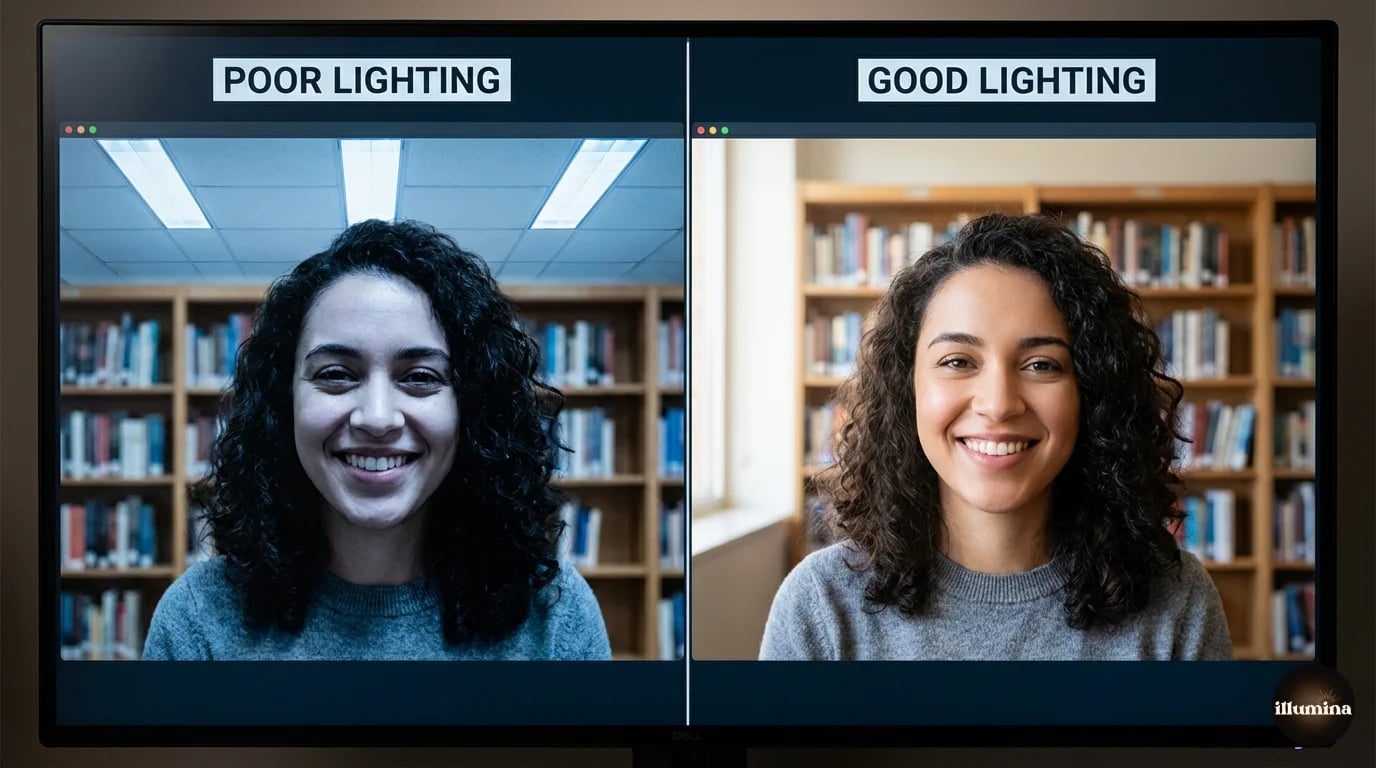
Lighting is everything
This is the single biggest factor in how you look on camera. Natural window light is the easiest solution: sit facing a window so the light hits your face evenly. If your only window is behind you, you'll be silhouetted and the virtual background will glitch constantly.
No good window? A ring light ($20-40) positioned directly behind your monitor works great. Or two desk lamps with daylight bulbs placed at 45-degree angles on either side of your screen. The goal is even, diffused light on your face with no harsh shadows under your eyes or nose.
Avoid overhead-only lighting. It creates dark eye sockets and unflattering shadows that make you look tired even when you're not.
Camera positioning
Your webcam should be at eye level or slightly above. Most laptop cameras sit below eye level, which gives everyone a lovely view of your ceiling and the underside of your chin. Stack your laptop on books, a monitor stand, or a dedicated laptop riser.
For external webcams, mount them on top of your monitor. And look at the camera lens when speaking, not at the faces on screen. It's counterintuitive but creates the impression of eye contact for the people watching.
Distance from your background
Physical distance between you and whatever's actually behind you matters for virtual background quality. Sitting right against a wall makes it harder for the AI to distinguish you from the background. Two to four feet of space gives the algorithm room to work and produces much cleaner edges.
Clothing considerations
Avoid wearing green if you use a green screen (obvious but worth stating). Beyond that, solid colors generally look better than busy patterns on camera. Thin stripes and small checks can create a moire effect that makes your shirt look like it's vibrating. Not ideal for a client presentation.
Also watch for colors that are too close to your skin tone or your background. If your shirt matches the virtual background, you get a weird floating-head effect where part of your torso disappears.
Hair edge issues
This is the most common complaint with virtual backgrounds. Your hair, especially fine or curly hair, gets a choppy, shimmering halo effect as the AI struggles to figure out what's you and what's background.
Fixes that actually help: better lighting (always the answer), sitting further from your physical background, and keeping hair styled close rather than loose and wispy. A green screen eliminates most hair edge problems. And some backgrounds are more forgiving than others. Darker backgrounds hide edge artifacts better than bright white ones.
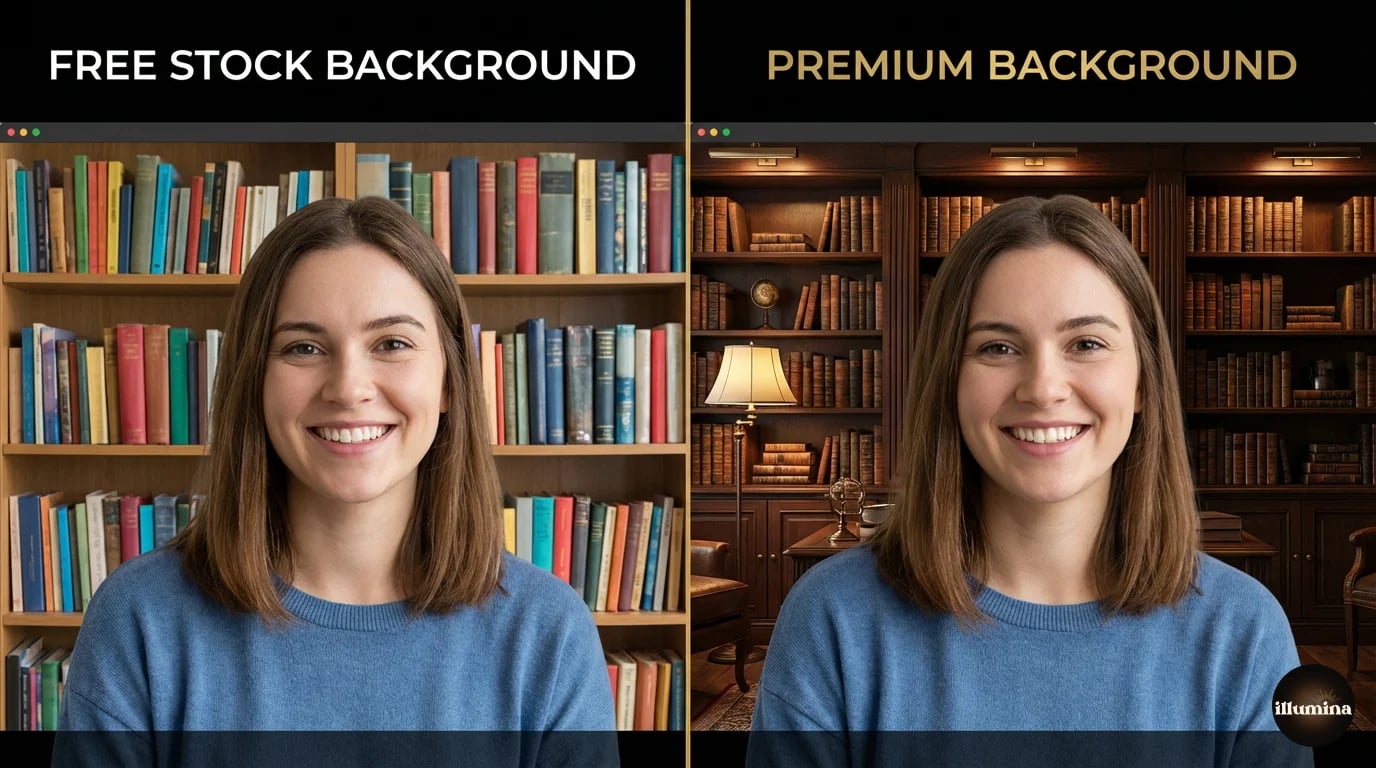
Premium vs Free Backgrounds
You have plenty of options for virtual backgrounds at every price point. Here's an honest breakdown.
Free options
Built-in backgrounds: Zoom, Teams, and Meet all include free backgrounds. They're generic but functional. Zoom's selection is the largest; Meet's is the smallest.
Download sites: Sites like Unsplash, Pexels, and Pixabay offer free high-res photos you can use as backgrounds. Search for "office interior," "bookshelf," or "modern workspace" and you'll find plenty of options. The catch is these photos weren't designed specifically for video calls. You'll need to evaluate each one for appropriate lighting direction, busyness level, and whether it looks natural at webcam aspect ratios.
Brand-provided backgrounds: Many companies create branded Zoom backgrounds for their employees. Check with your marketing or comms team before spending time sourcing your own.
Why premium backgrounds look better
The difference between a random free image and a purpose-built virtual background is noticeable. Premium background packs are designed specifically for video calls, which means:
- Consistent lighting: The light direction and quality is designed to match typical webcam setups
- Appropriate detail levels: Enough visual interest to look real, not so much that it distracts
- Multiple variations: You get a cohesive set rather than mismatched random images
- Higher resolution: Crisp and clean even on large monitors and external displays
- Realistic depth: Objects in the background have natural focus fall-off that mimics a real camera
If you're on camera daily for client calls, interviews, or presentations, the difference is worth the investment. A polished background communicates professionalism the same way a clean shirt and good grooming do.
Illumina Backdrops offers 25+ themed Zoom background packs covering offices, libraries, beach scenes, yoga studios, Mediterranean patios, and more. Each pack includes multiple variations with lighting designed to match standard webcam positioning.
Is free good enough?
For internal team calls and casual meetings, absolutely. The built-in options work fine. For client-facing calls, interviews, or any situation where first impressions carry weight, premium backgrounds are a small investment that pays off in perception. You wouldn't show up to a client meeting in a wrinkled shirt. Same logic applies to your virtual background.
Troubleshooting Common Problems
Virtual backgrounds don't always cooperate. Here's how to fix the most common issues.
Flickering and shimmering edges
Your outline flickers or shimmers, especially around your hair and shoulders. This is an edge detection problem. Fixes:
- Improve your lighting. This solves 90% of flickering issues.
- Increase the distance between you and your physical background.
- Close other CPU-intensive applications. Edge detection is processor-heavy.
- In Zoom, try toggling the "I have a green screen" checkbox even if you don't have one. Sometimes it changes the algorithm in a way that works better for your setup.
Background bleeding through
Parts of your actual room show through the virtual background, usually around your edges or when you move. This happens when the AI loses track of your outline.
- Reduce clutter behind you. A clean, solid-colored wall gives the AI an easier job.
- Avoid backlighting. Light sources behind you confuse edge detection badly.
- If you're wearing a color similar to your physical background, change your shirt.
Performance issues on older hardware
Virtual backgrounds use significant CPU power. If your computer is struggling (fans spinning, video lagging, audio cutting out):
- Use a static image instead of a video background. Video backgrounds use roughly 3x the processing power.
- Lower your video resolution in settings.
- Close browser tabs and other applications.
- On really old hardware, consider the "blur" option instead of a full background replacement. Blur uses less processing power and still hides your actual room.
Background looks washed out or dark
This usually means your camera's auto-exposure is adjusting for your face and overriding the background brightness. Manual exposure settings in your webcam software can help. Alternatively, choose backgrounds with mid-range brightness rather than very bright or very dark scenes.
Green screen setup tips
If you've decided to go the green screen route for maximum quality:
- Use a matte green fabric, not glossy. Glossy screens create hotspots that look white instead of green.
- Light the screen separately from yourself. Two cheap clip lights on either side of the screen create even coverage.
- Iron or steam out wrinkles. Every fold creates a shadow that shows up as a dark streak in your background.
- Keep at least three feet between yourself and the screen to prevent green light bouncing onto your skin and clothes (green spill).
Virtual backgrounds have gone from a novelty to a standard part of professional remote work. Getting yours right takes about ten minutes of setup and makes every video call look more polished. Start with good lighting and a clean background image, and you're already ahead of most people on the call.
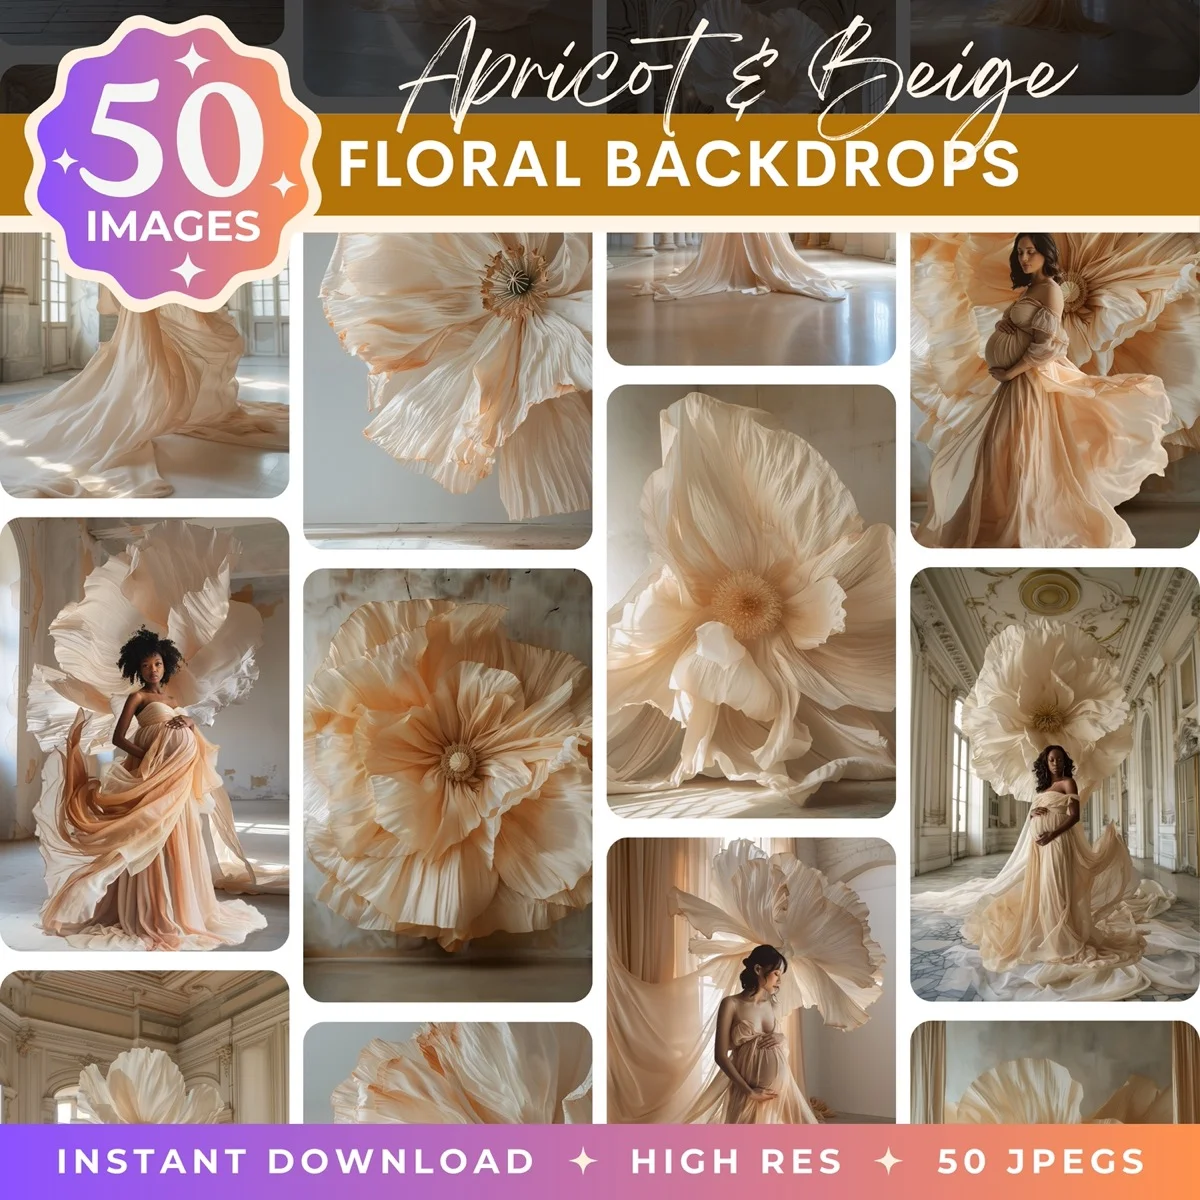
Transform Your Photos
Give Your Photos the Wow Factor
Browse our collection of premium digital photo backdrops. 50 high-resolution print-ready backgrounds in each pack. Instant download.
Browse Backdrops